How do I manage my Group settings in the Cloud?
This article is going to explain how to manage your group settings from the cloud at cloud.measuresquare.com. To start you must contact Measure Square Support and request they create a group for your account. Followed by adding other accounts to your group. Once your group is set up, you can adjust your system settings on your device then upload those settings to be used by every account listed in the group.
Share Profile Settings to your Group in MeasureSquare Cloud:
Step 1: Set up a group and members.
Step 2: Navigate to to MeasureSquare Cloud at cloud.measuresquare.com and sign in with your MeasureSquare ID and password

Sync Profile Settings from MeasureSquare 8 for Desktop:
Step 1: Adjust your System Settings and Print Settings accordingly.
Step 2: Upload your settings to the cloud. Click on the blue File tab at the top left of your screen. Locate Sync Profiles panel and click on the tab then click on Upload Settings.

Sync Print Settings from MeasureSquare 8 for Desktop:
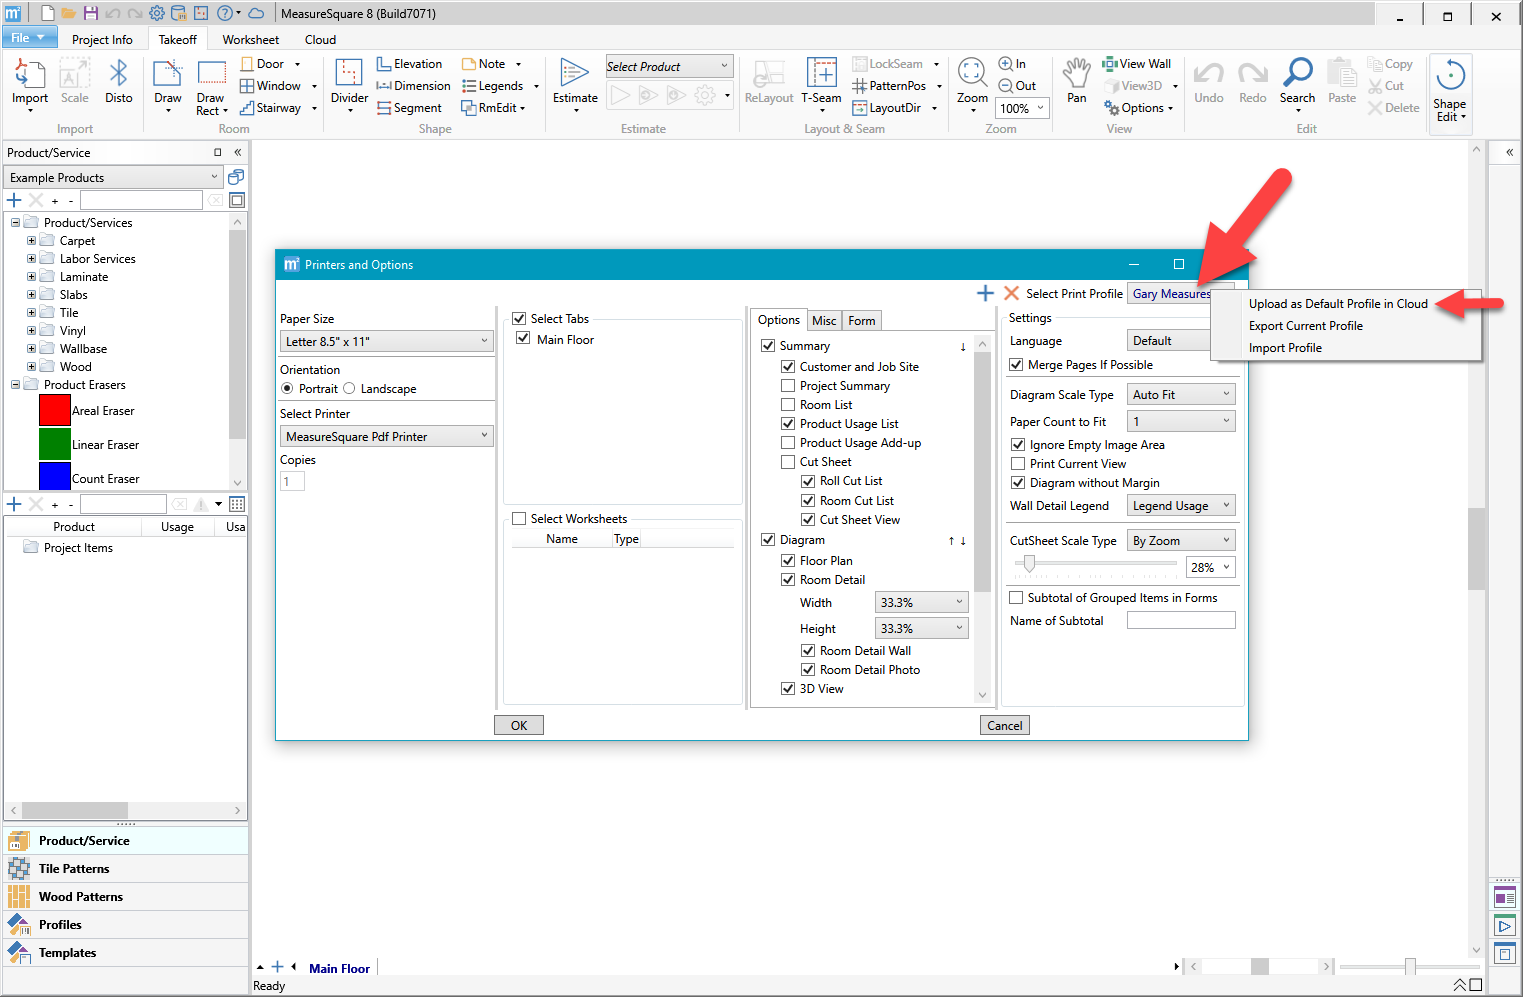
Step 1: Adjust your Print Settings accordingly.
Step 2: Save Locally/Export and upload your Print Settings. Once you have adjusted your printer settings you can save the Print Profile locally.


Sync Profile Settings MeasureSquare Mobile on iPad/Android tablet:
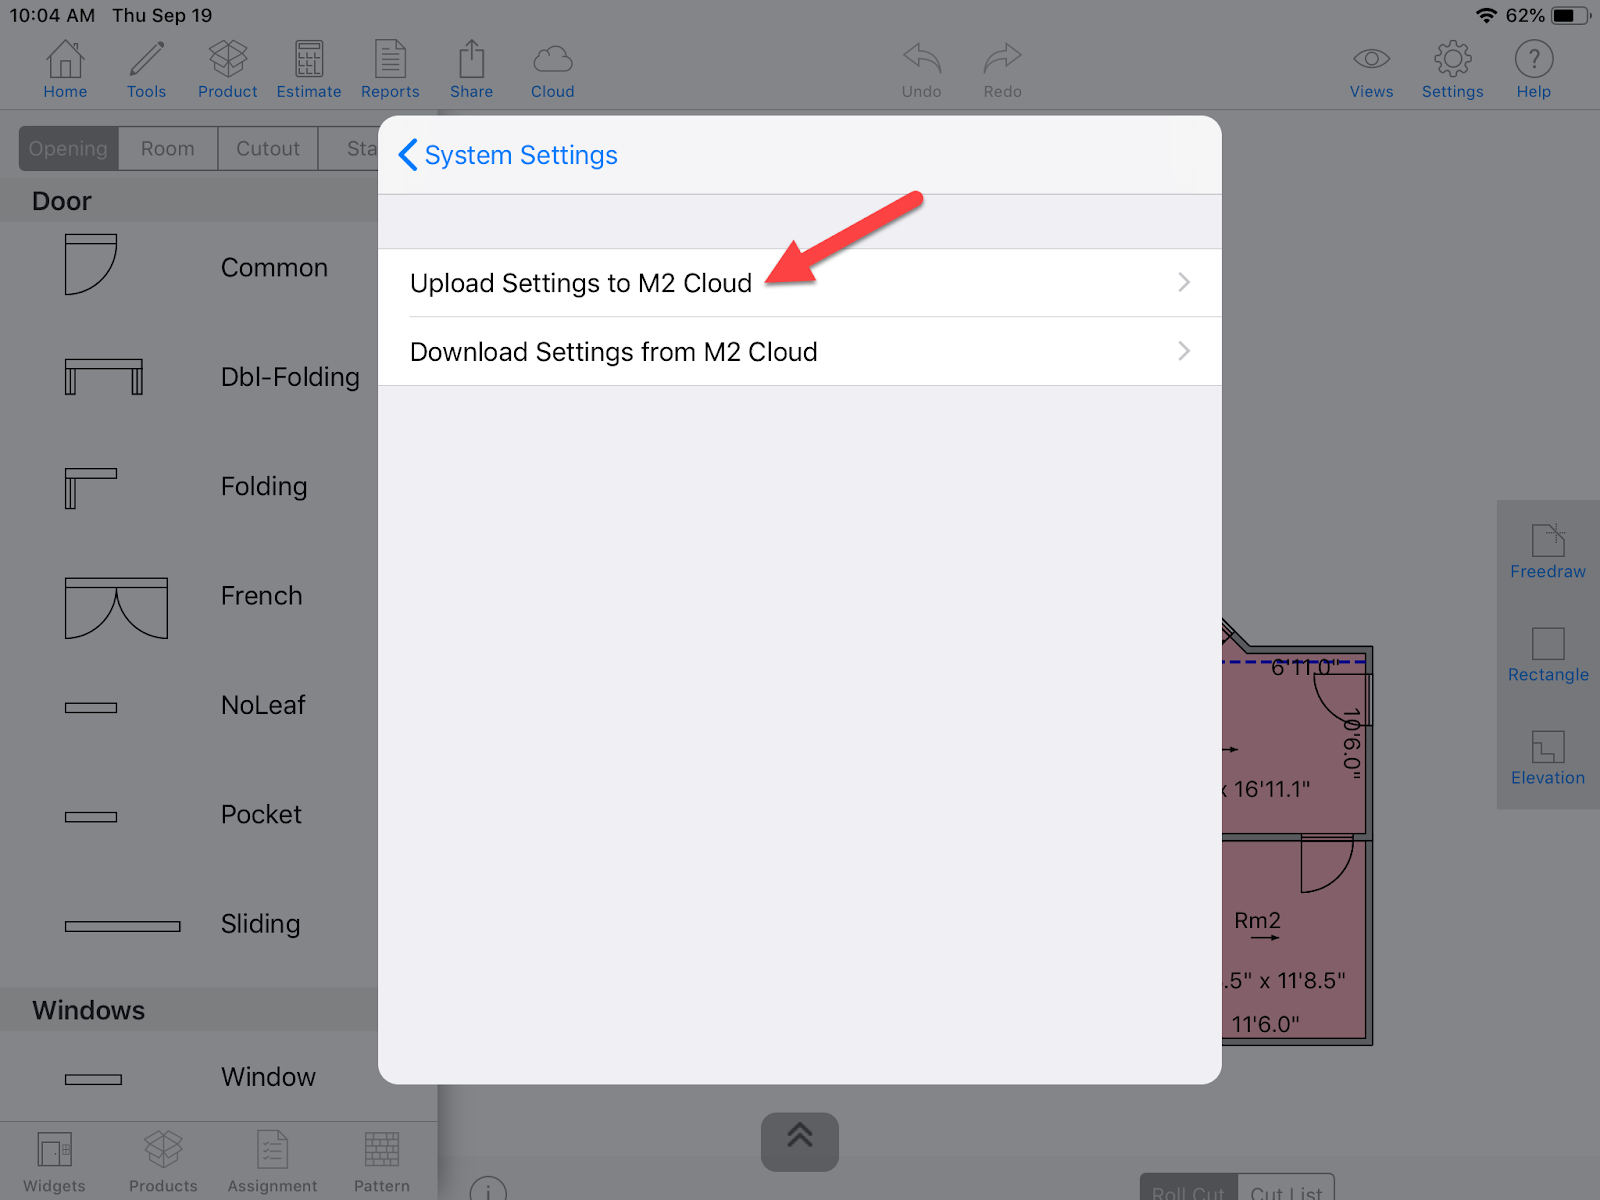
Step 1: Adjust your System Settings and Print Settings accordingly.
Step 2: Upload your settings to the cloud. Tap on the Project Settings Gear icon at the top right from your diagram screen.


Related Articles
How do I manage my Group settings in the Cloud?
This article is going to explain how to manage your group settings from the cloud at cloud.measuresquare.com. To start you must contact Measure Square Support and request they create a group for your account. Followed by adding other accounts to your ...How to Manage Project Sync Settings in MeasureSquare Stone
This article explains how to manage Project Sync settings in MeasureSquare Stone Access System Settings Step 1. Click the gear button at the top left of your window to access System Setting Step 2. Click the Advanced tab Select Sync Settings and Save ...How to Manage Sync Settings in MeasureSquare 8
This article explains how to manage Sync settings in MeasureSquare 8 Access System Settings Step 1. Click the gear button at the top left of your window to access System Setting Step 2. Click the Advanced tab Select Sync Settings and Save Step 3. ...How do I manage my Project Providers and Project Subscribers on the MeasureSquare Cloud as a group Admin?
This article will show you how to manage settings on The Cloud for the Project Subscribers and Providers of your group members as an Admin This article applies to MeasureSquare Cloud Info: You can see a tooltip about providers and subscribers from ...How do I manage group licenses as an Admin on the MeasureSquare Cloud?
In this article, we are going to show you how to check which licenses are available in your group via the cloud at cloud.measuresquare.com This article applies to MeasureSquare Cloud. Step 1: Log in to your cloud account at cloud.measuresquare.com. ...