How to Create a Quote in MeasureSquare CRM
In this article you will learn how to create a quote on MeasureSquare CRM.
There are two methods to create a new quote:
Method 1
Method 1
Step 1. Select your project
Step 2. From your Project view, open your diagram
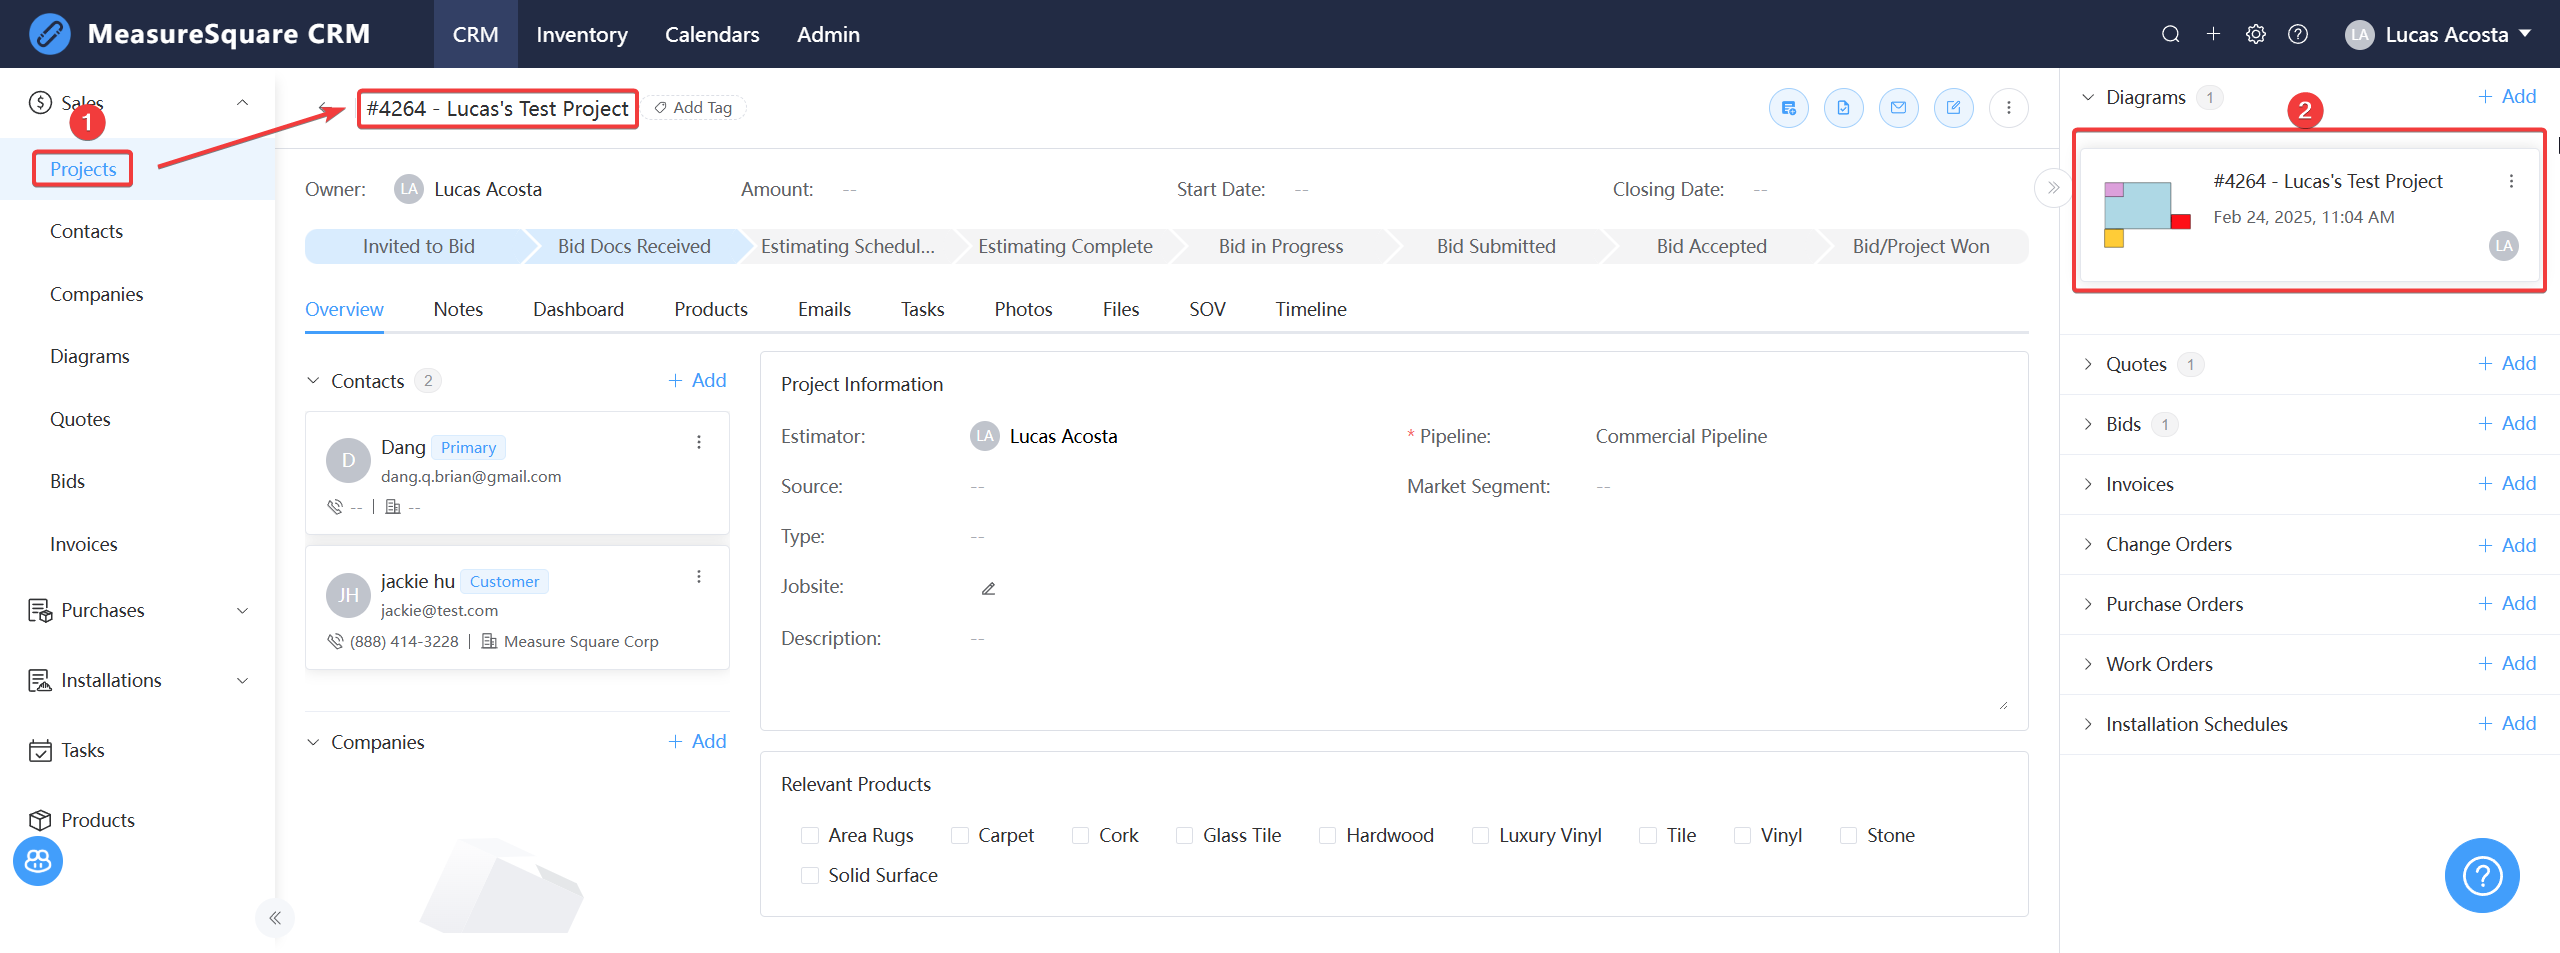
Step 2. From your Project view, open your diagram
Step 3. Click the +Add button to the right of Quote at the top right of your window
Step 3a: You may also create a quote broken out by room
Step 3b: all the same display options are included with your quote
Step 4. Select the products you wish to add to your Quote and select Save
Step 5. On the Quote worksheet section, you can fill in the necessary Quote information and also edit your Item Details:
Step 6. Click on Save to proceed
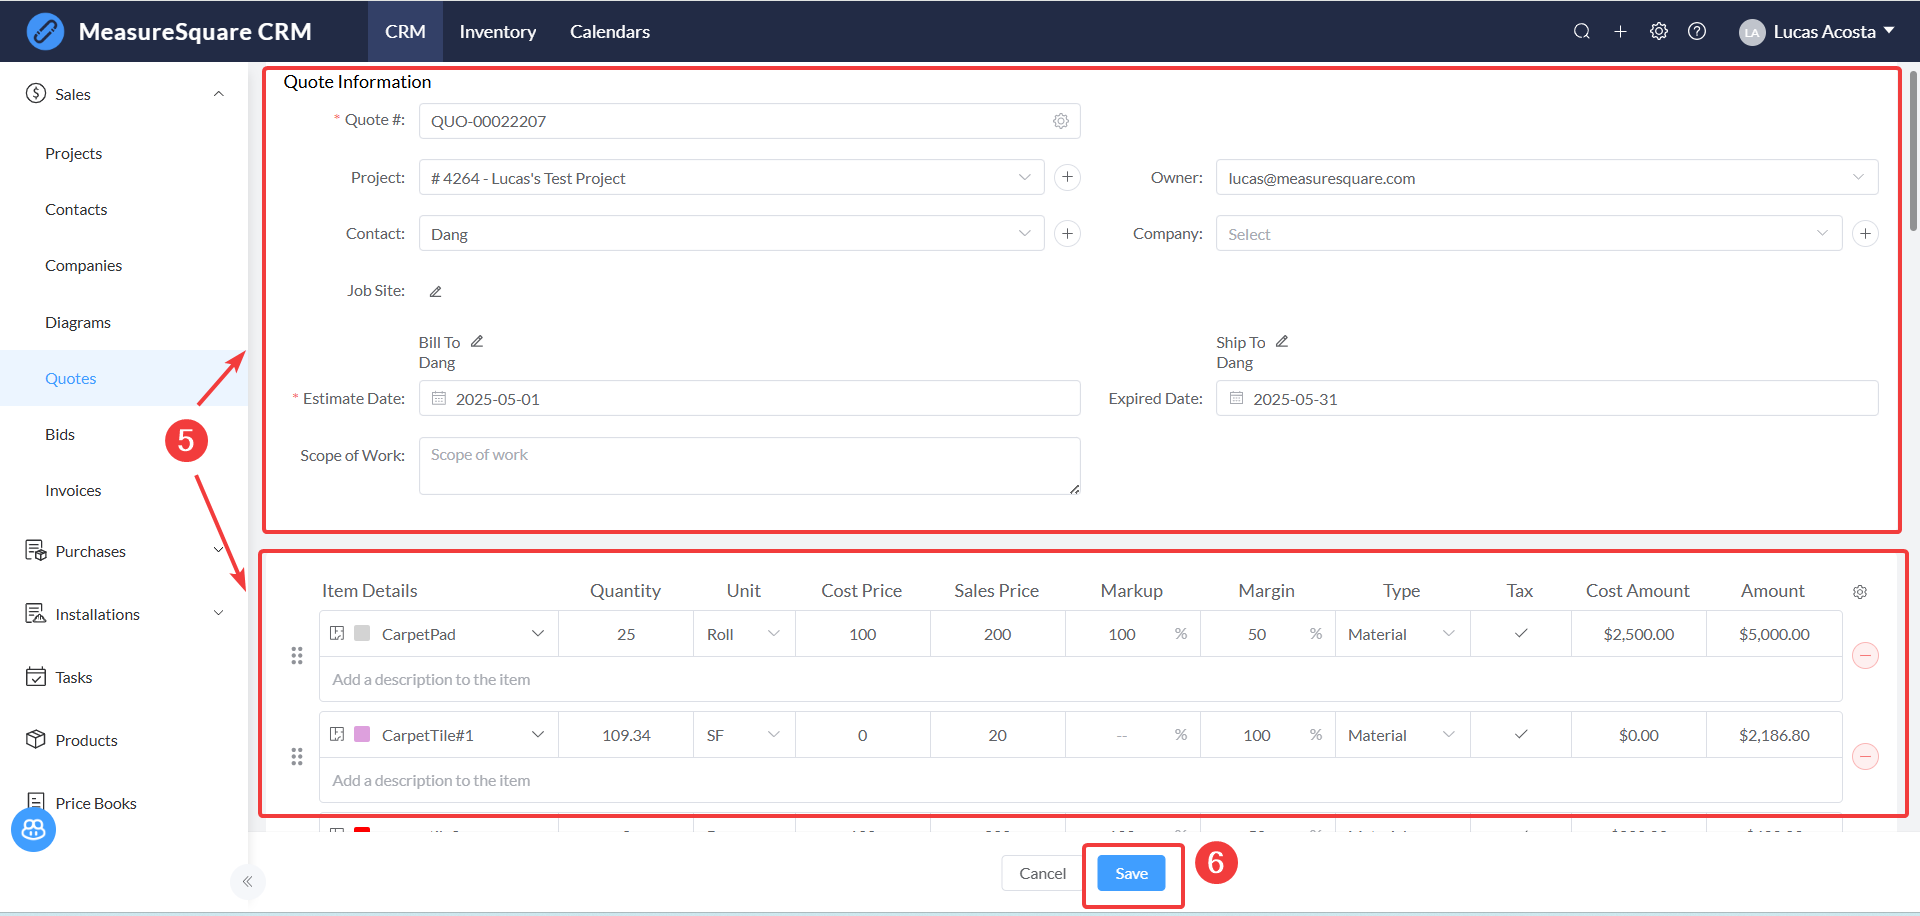
After saving, you will now be brought into the preview screen of your newly-created Quote:

After saving, you will now be brought into the preview screen of your newly-created Quote:
Method 2
Step 1. Click on the Projects tab and select your project
Step 2. Click the "+ Add button" to the right of the Quotes tab on the upper right corner of your window
Step 1. Click on the Projects tab and select your project
Step 2. Click the "+ Add button" to the right of the Quotes tab on the upper right corner of your window
How to customize the columns/show which columns display on your quote worksheet
Step 1. Go to your Quotes or Jobs tab depending on where your worksheet data is tied, and open the quote or job you're working on
Step 2. Hover over the the Customize button with the gear icon at the top of your quote and click Display Options.
Step 3. Left click the toggle switches to the right of each setting to choose which columns to show.
In this video we will be creating a quote in Measuresquare CRM
For any further questions, please reach out to our Support team
Monday - Friday from 7:30am-4:30pm PST: (626) 683-9188 ext. 3
All Hours: support@measuresquare.com