How to change the Waste Share Option and Waste Share Radius for Tile product in MeasureSquare 8?
This article will guide you through how to adjust the Waste Share Option and Waste Share Radius for tile products in MeasureSquare 8.
---

- Project: Shares waste across the entire project.
- Tab: Shares waste within the current tab.
- Room: Shares waste within the specific room.
---
- Select the desired radius value (e.g., 3', 6', 12', 24', 36', or ∞).
- This determines the range within which waste is shared.

---
---
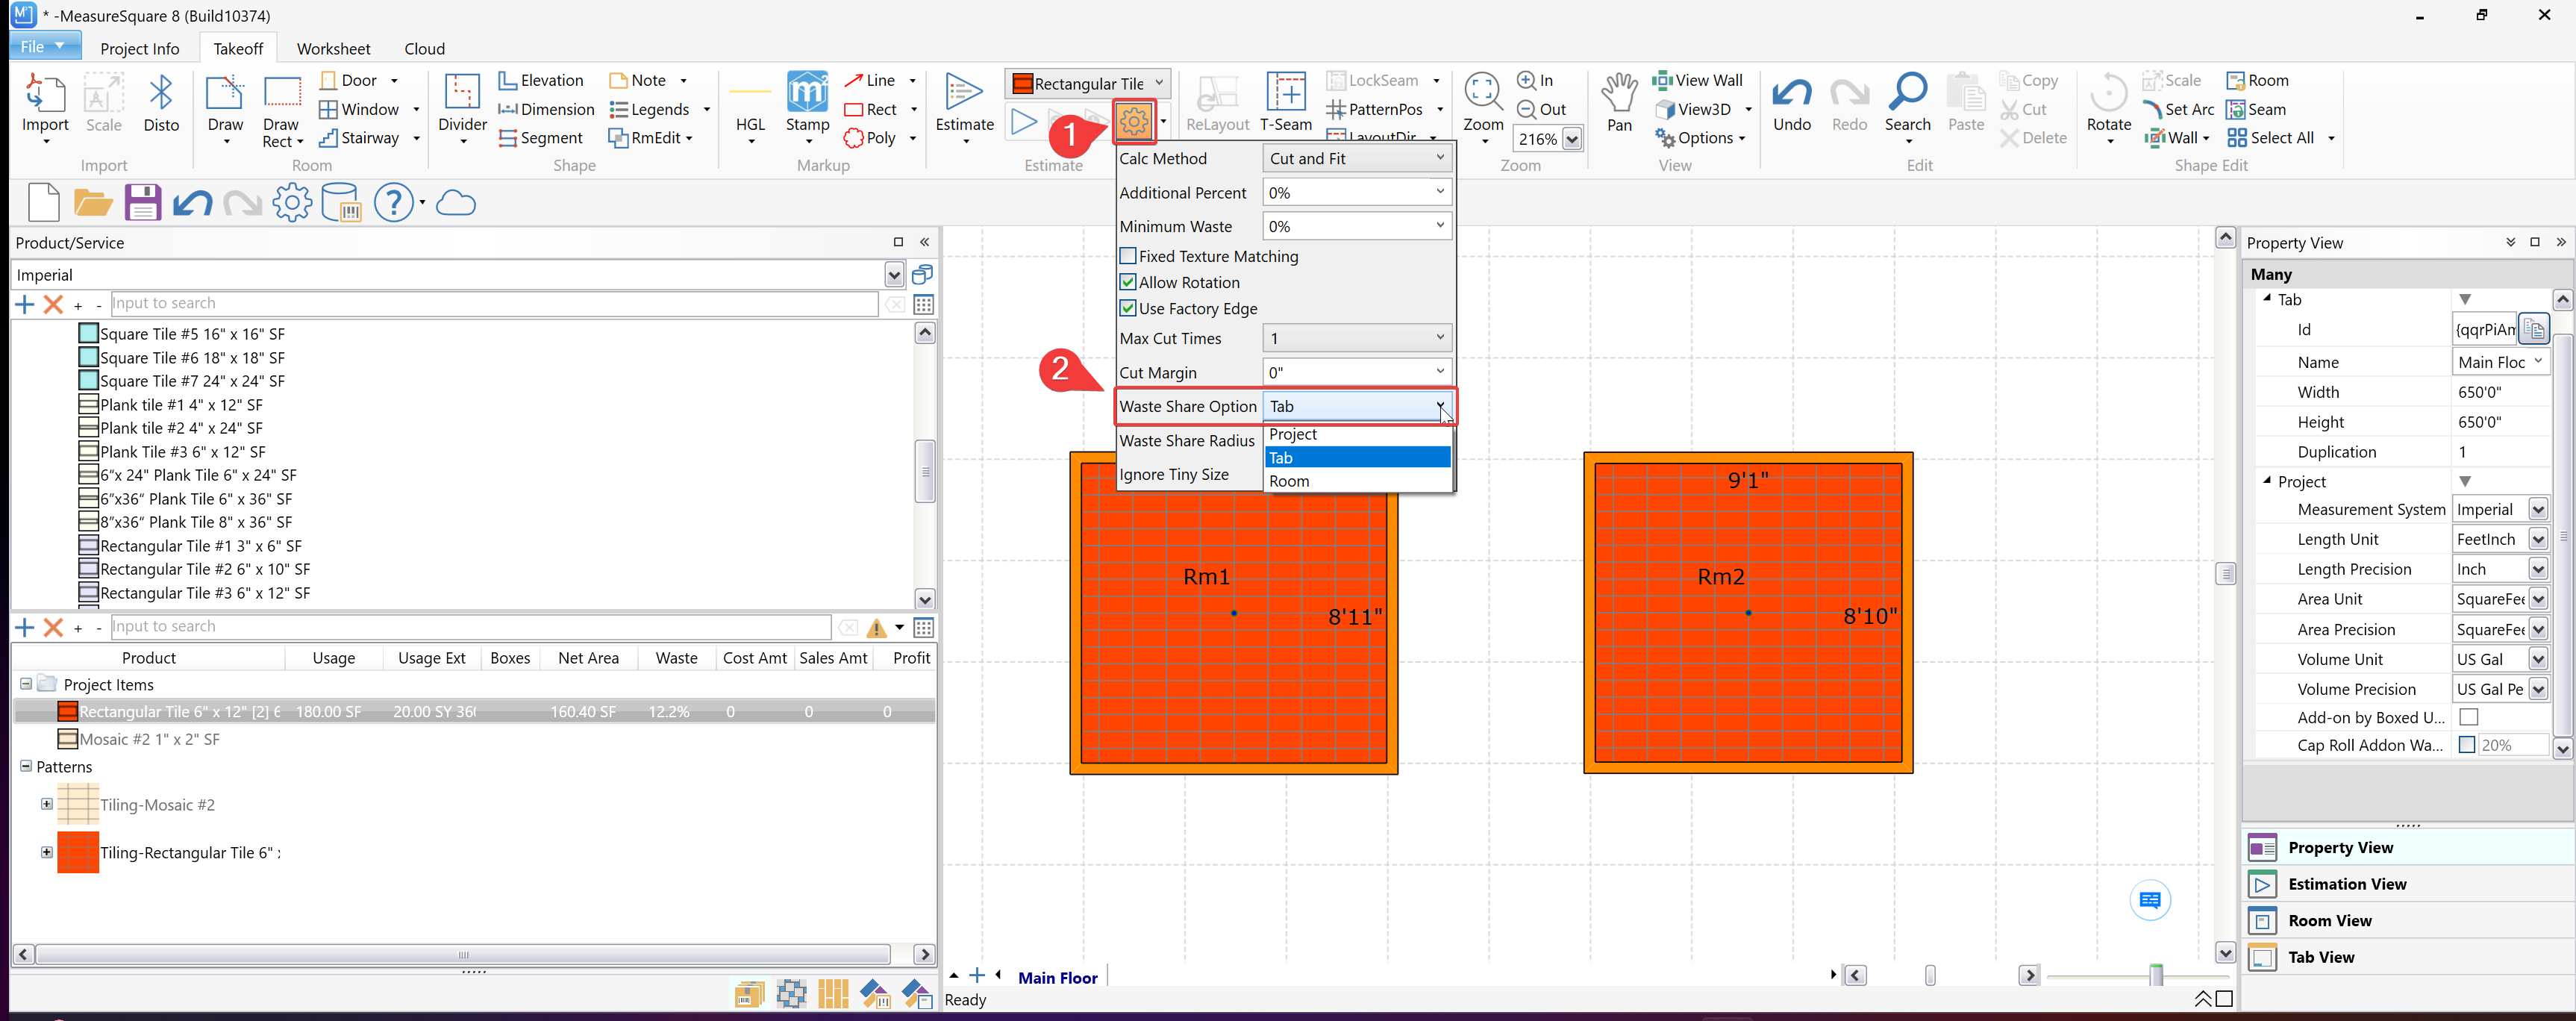
The Waste Share option is available only when a tile product uses "Cut and Fit" as the selected Waste Calculation method
Method 1: From the Product Estimation (applies to a specific tile product):
Step 1: Access the Tile Product Settings
Click on the Settings icon next to the selected tile product in the toolbar.Step 2: Change the Waste Share Option
Under the Cut and Fit settings, locate the Waste Share Option dropdown menu.- Project: Shares waste across the entire project.
- Tab: Shares waste within the current tab.
- Room: Shares waste within the specific room.
---
Step 3: Adjust the Waste Share Radius
Below the Waste Share Option, locate the Waste Share Radius dropdown menu. - Select the desired radius value (e.g., 3', 6', 12', 24', 36', or ∞).
- This determines the range within which waste is shared.
---
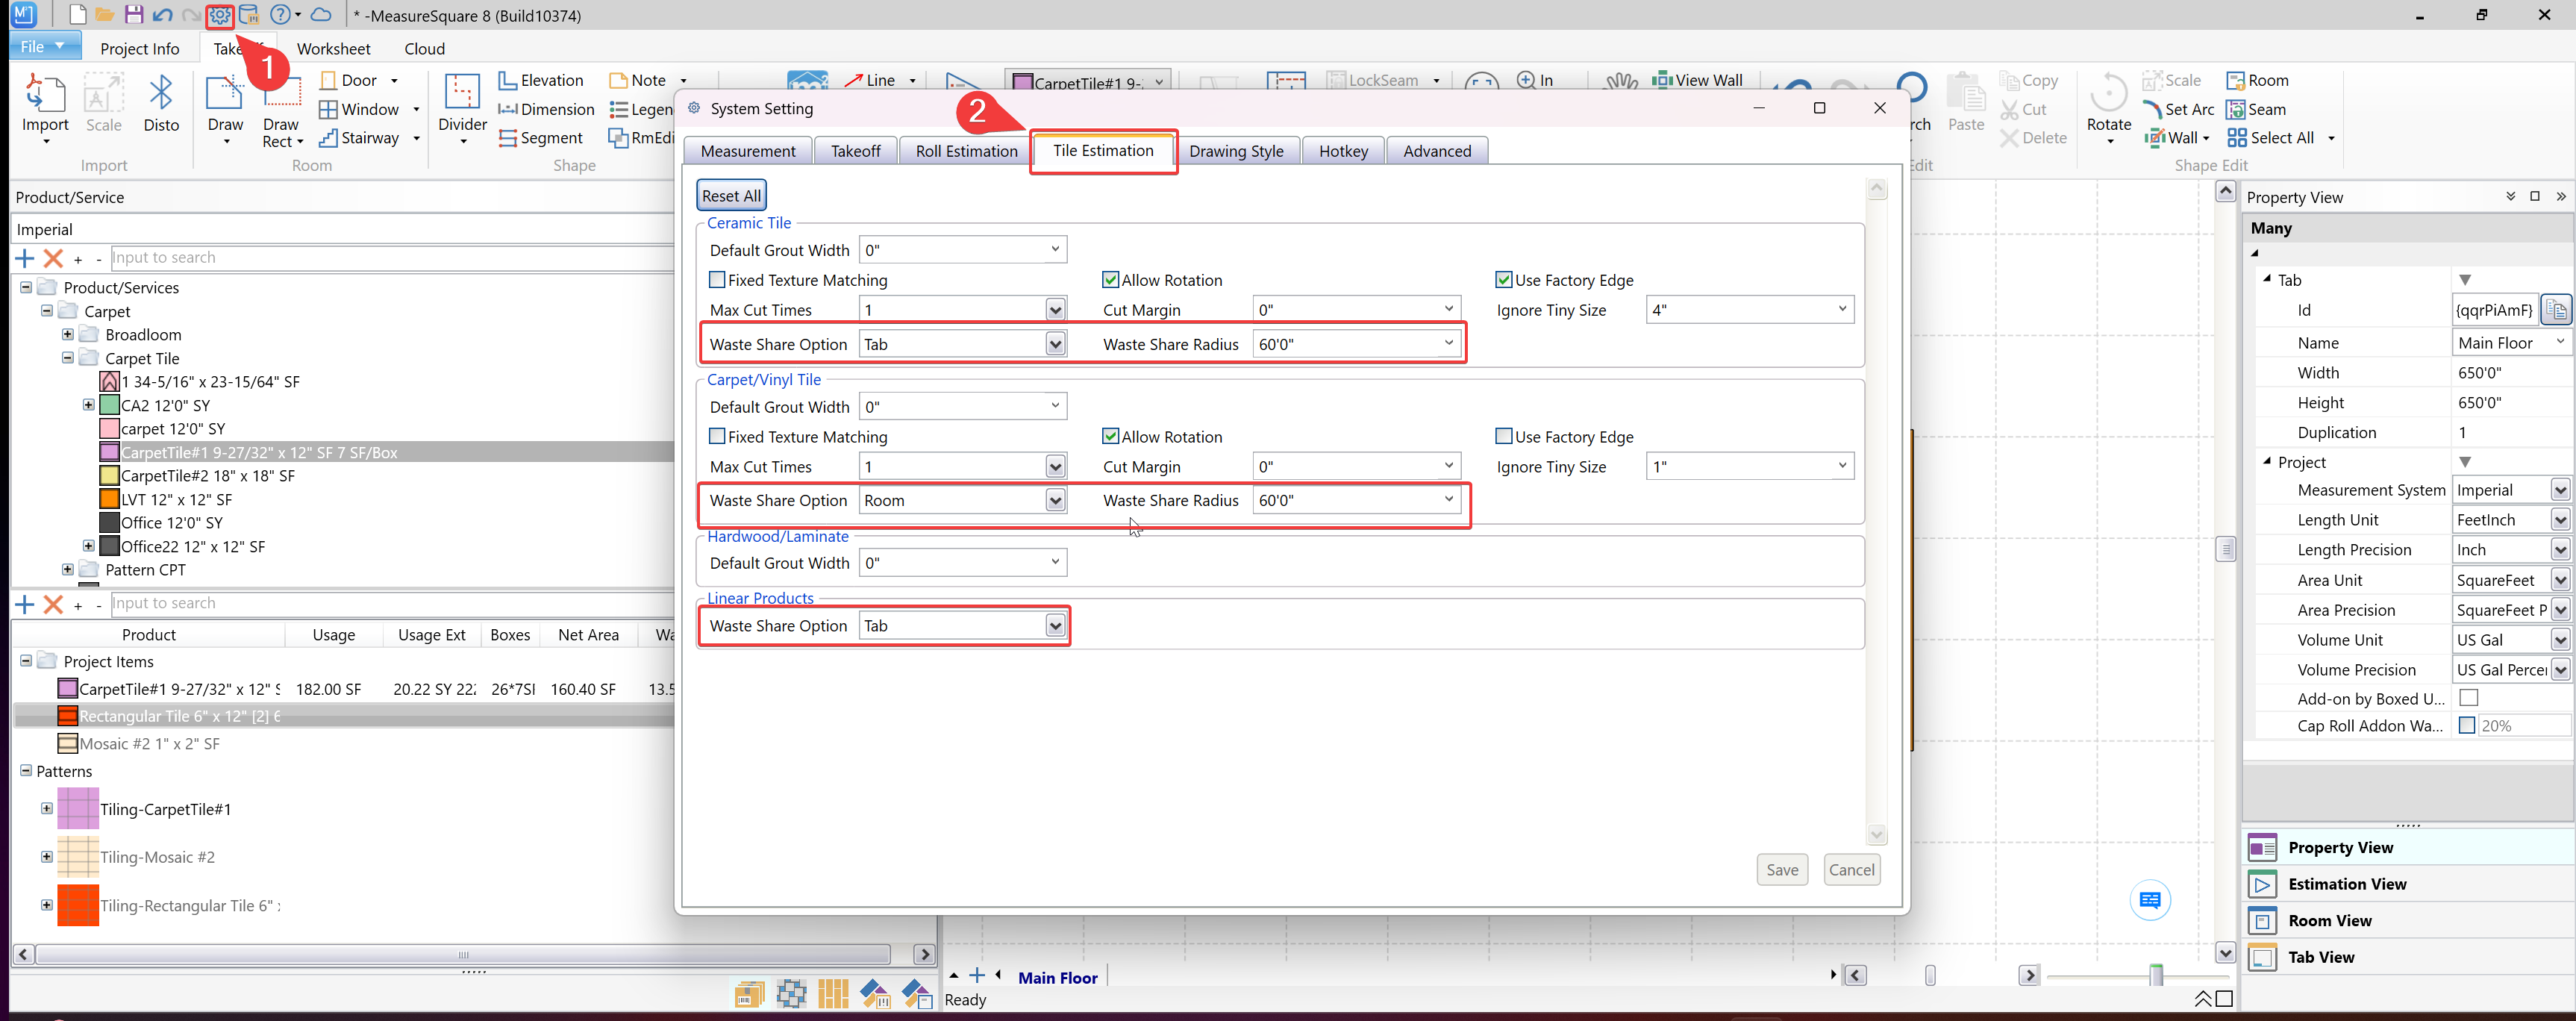
Method 2: From the System Setting (applies to all tile products):
Step 1: Open the System Setting by Clicking on the System Setting icon located in the top toolbar.
Step 2: In the System Setting window, switch to the Tile Estimation tab.
Step 3: Adjust the Waste Share Option and Radius.The changes will now apply to all future projects using the selected product types.
The system setting will only apply to all future projects.
🔍 Why Waste Share Radius?
Waste Share Radius sets a maximum distance between rooms or areas for sharing leftover material. If the distance is too far (e.g. more than 60'), the system won't allow waste to be reused across those rooms.
📦 Why this matters in real life:
Installers can’t easily transport waste due to install schedule.
Site conditions (limited space, clutter, safety regulations) make it unrealistic to store or move remnants.
General contractors prefer clean, tidy workspaces—installers may discard remnants to avoid clutter.
OSHA rules penalize job sites with scattered materials due to safety risks.
So, instead of planning to reuse the waste unrealistically, it’s better to account for it as true waste in the material estimate.
Note:
If you need further assistance, contact MeasureSquare Customer Support at +1-626-683-9188 or email support@measuresquare.com.Related Articles
How to Create a Tile Product on MeasureSquare Mobile for iPad
In this article we will be covering how to create a tile product on MeasureSquare Mobile for iPad. This article applies for Build 2.9.6 and newer. Step 1: Select 'Products' in the top left then select 'Product Catalog' Step 2: Select the '+' in the ...How do I use Waste Addon Calculation Method?
In this article, we will be going over all the estimating settings for Waste Addon. This article applies to all MeausreSquare products. What is Waste Addon? You can add the percentage Waste over the net area for the Waste Add-on option. Waste Add-on ...How do I use the Cut and Fit option for Tile Calc Method?
In this article, we will be going over all the estimating settings for Cut and Fit. This article applies to MeasureSquare 8 Desktop version What is Cut and Fit? Count the tile piece by piece. MeasureSquare will try and reuse remnants of a tile that ...How to Create a Tile Product on MeasureSquare 8?
In this article we will be covering how to create a tile product on MeasureSquare 8. This article applies to Build 8941 and newer. Step 1: Select the '+' in the top left of the 'Product/Services' Step 2: From the 'New Product' window include your ...Release Notes for MeasureSquare 8
For the latest updates visit the weblink below. https://cloud.measuresquare.com/releasehistory 1.0.11.7587 ------------------------- UI Improvement ------------------------- 1. Enhanced the Project Items, it now shows Net Area, Cost Amt, Sales Amt, ...