How to apply grout product on MeasureSquare Mobile ipad?
This article will guide you through the steps to apply a grout product in MeasureSquare Mobile (iPad).
---
- Set the Trade to Tile.
- Fill in other details such as Unit, Color, and Description.
- Tap Done to save the grout product.
---
---
- Select By Pattern (marked as 2) and tap the Info icon next to the tile pattern (marked as 3).
---
- Select the Grout Product you created earlier.
- Set the Grout Width (e.g., 1 inch).
- Tap Done to save the settings.
---
- The Assignment tab will display the quantity of grout required for the project.

---
---
Steps to Apply Grout Product:
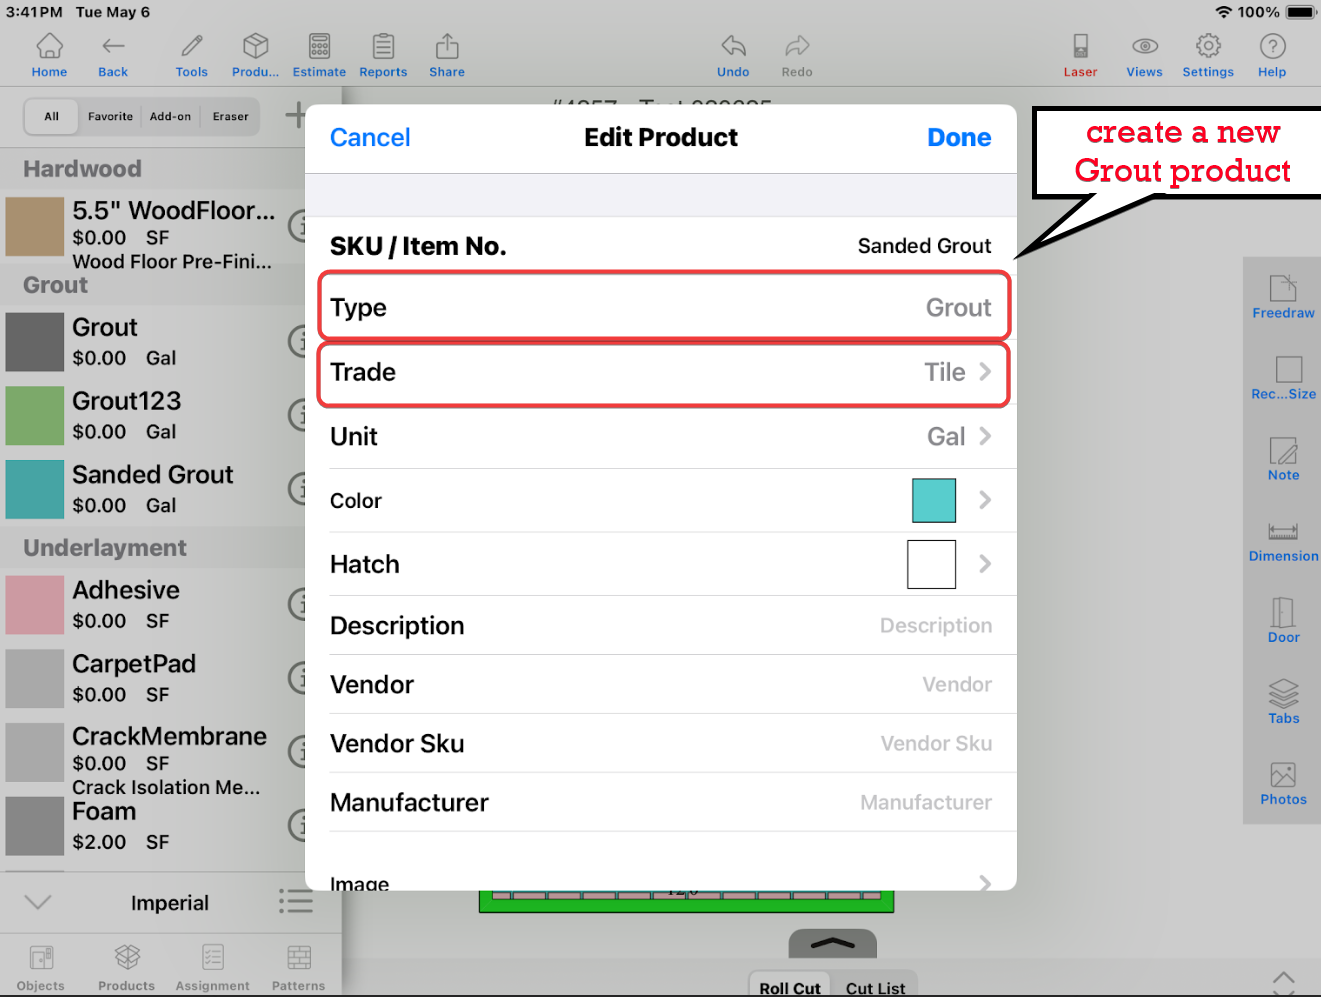
Step 1: Create a New Grout Product
- Set theType to Grout.- Set the Trade to Tile.
- Fill in other details such as Unit, Color, and Description.
- Tap Done to save the grout product.
---
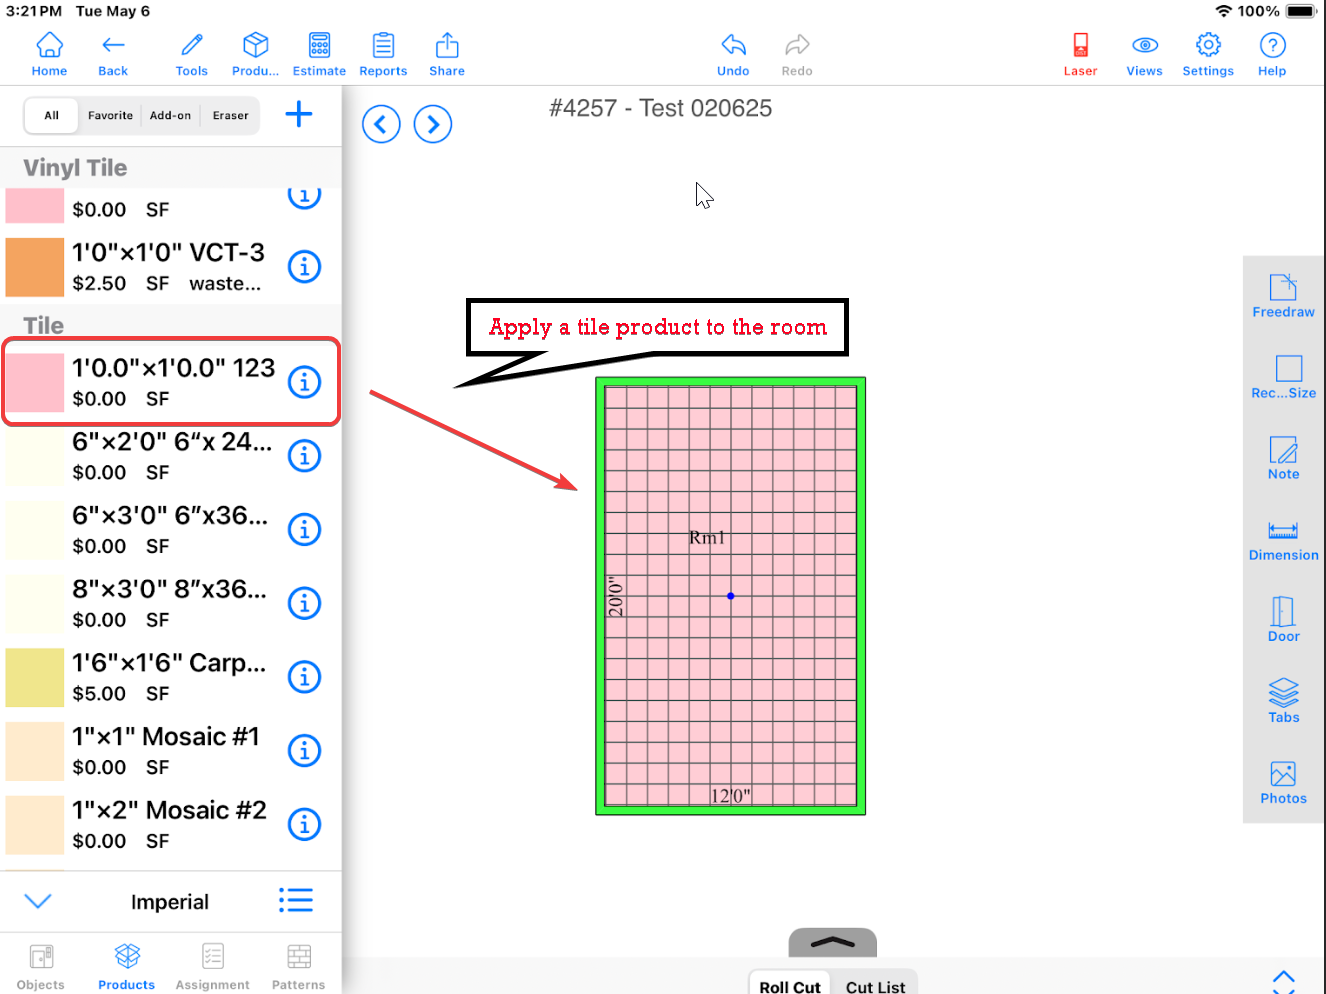
Step 2: Apply a Tile Product to the Room
- From the Products tab, choose a Tile Product and drag it onto the room.---
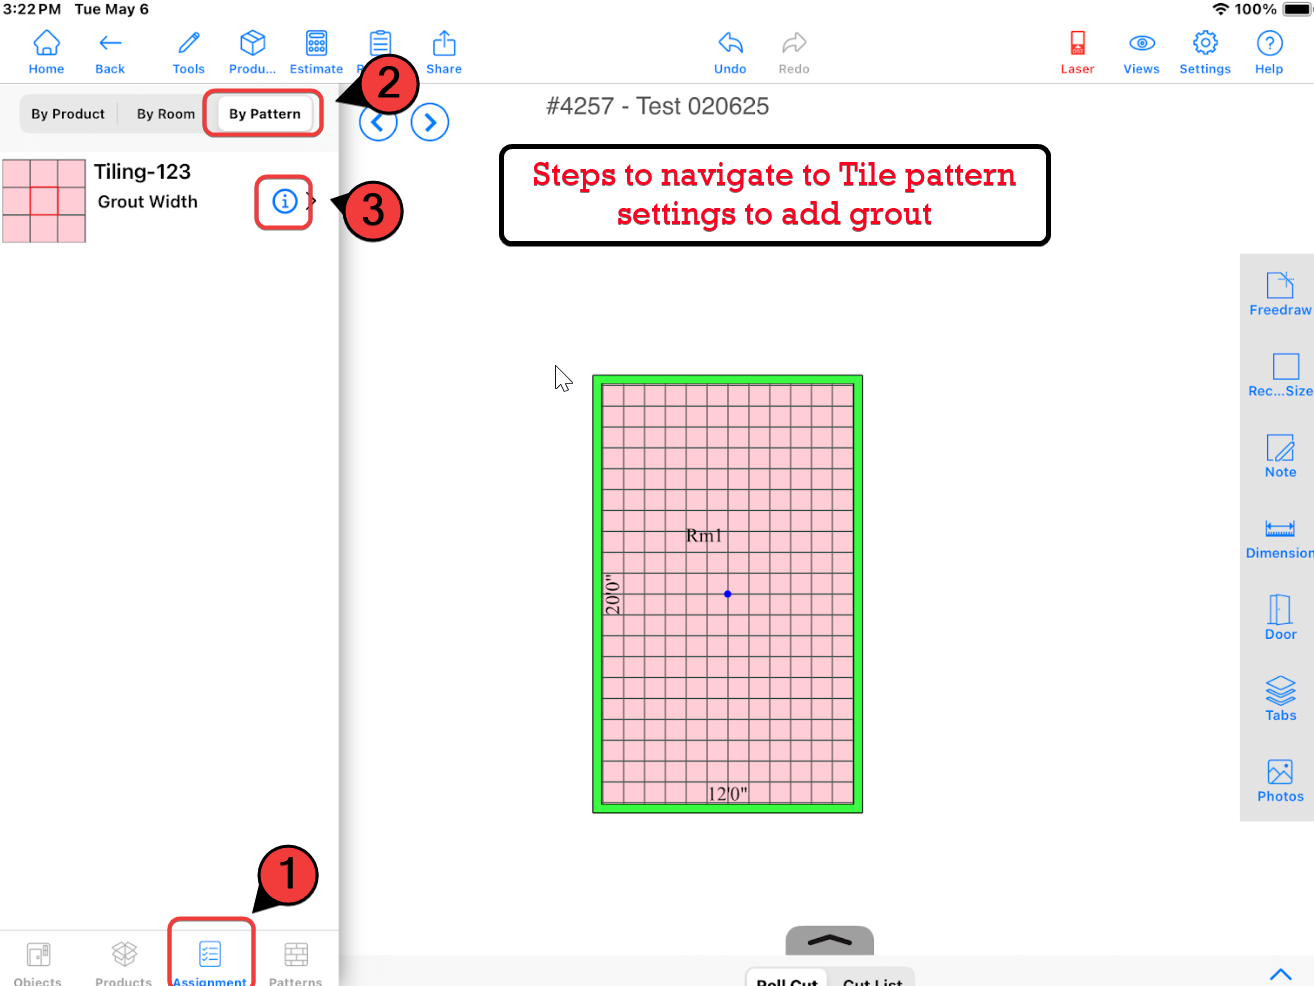
Step 3: Navigate to Tile Pattern Settings to Add Grout
- Go to the Assignment tab at the bottom of the screen (marked as 1 in the screenshot).- Select By Pattern (marked as 2) and tap the Info icon next to the tile pattern (marked as 3).
---
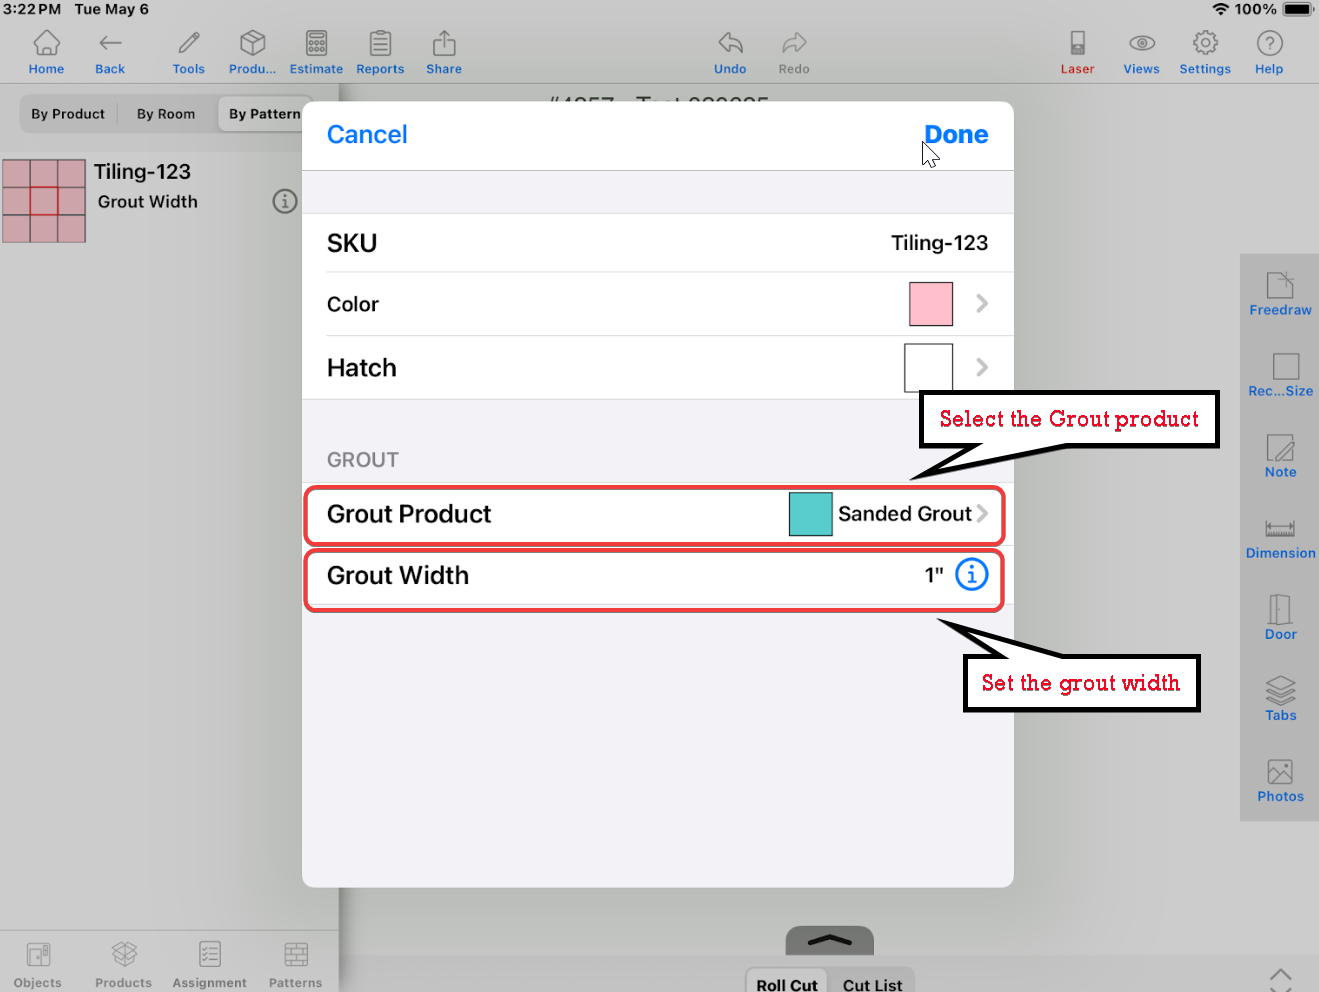
Step 4: Configure Grout Settings
- In the Grout section of the tile pattern settings:- Select the Grout Product you created earlier.
- Set the Grout Width (e.g., 1 inch).
- Tap Done to save the settings.
Note: The grout width will reduce the tile net area (tile product quantity) accordingly
---
Step 5: Review Grout Application
- The grout seams will now appear between the tiles in the room layout.- The Assignment tab will display the quantity of grout required for the project.
Note:
If you need further assistance, contact MeasureSquare Customer Support at +1-626-683-9188 or email support@measuresquare.com.Related Articles
CRM User Manual: Takeoff/Bid Management, Lesson 1: Takeoff
MeasureSquare has been a leader in digital takeoff and estimating solutions for over 20 years. When paired with MeasureSquare CRM, your takeoff data becomes significantly more powerful, enabling automation, eliminating double-entry, and streamlining ...Missing contents/topics in MeasureSquare Mobile for iPad
This article is about missing contents/topics in our tutorial. This article applies to MeasureSquare Mobile App for IOS Build 2.9.6 and newer. Applying tile pattern - with the latest update, we've added more pre-programmed tile patterns to the ...How to Apply Single Products to Rooms on MeasureSquare Mobile for iPad
This article will go over how to apply single products, such as corners or anything you would like to point out, to your jobs on MeasureSquare Mobile for iPad. This article applies to Build 2.9.6 and newer.How do I sync my Product Catalogs in MeasureSquare Mobile for iPad?
How do I sync my Product Catalog in MeausureSquare Mobile for iPad? In this article, we will show you how to sync your Product Catalog on MeasureSquare Mobile for iPad. This article applies to MeasureSquare Mobile App IOS. Step 1: From the diagram ...How Do I Adjust the Grout Width in My System Settings for MeasureSquare Mobile on iPad?
In this article, we will show you how to set your default grout width in your system settings. This article applies to MeasureSquare Mobile for iPad Build 2.9.6 and newer. Step 1: From your diagrams screen, tap on the Project Settings gear icon at ...