Creating and Opening Diagrams in MeasureSquare CRM (from M2web, Cloud, and Locally)
In this article, we will show you the features of the Diagrams module in MeasureSquare CRM.
MeasureSquare CRM's diagram feature allows you to create simple floorplans up to 5,000SF using the new M2web tool (in beta), as well as import diagrams created on MeasureSquare 8/MeasureSquare Mobile from the MeasureSquare cloud and local projects.
Once a completed diagram is added to a project, the CRM system can use product info, quantities and pricing from your takeoff diagram to publish your project docs without any additional info.
Documents you can create include quotes, bids, purchase/work orders, invoices, and more.
Once a completed diagram is added to a project, the CRM system can use product info, quantities and pricing from your takeoff diagram to publish your project docs without any additional info.
Documents you can create include quotes, bids, purchase/work orders, invoices, and more.
Method 1: Creating a Diagram in MeasureSquare CRM
Steps to create new diagrams using the built-in M2web tool:
Step 1: Click the Diagrams tab in the main navigation menu of the dashboard.
Step 2: Click the New Diagram button located at the top-right corner of the screen.
Step 3: Fill out the details for your new diagram.
You will be prompted to either choose an existing project from the Project dropdown, or create a new one.
Step 4: Click Save
Step 5: Use the drawing tools to create your diagram
Utilize the available tools such as shapes, lines, text boxes, and icons to design your diagram.
Drag and drop elements onto the takeoff screen and customize them as needed.
Utilize the available tools such as shapes, lines, text boxes, and icons to design your diagram.
Drag and drop elements onto the takeoff screen and customize them as needed.
Step 6: Save your diagram.
Once your diagram is complete, click on the Save button to store it in the CRM.
Method 2: Cloud Diagrams (most efficient method)
Steps to use existing MeasureSquare diagrams from the cloud
Step 1. From your Projects page, click the Add + button to the right of Diagrams
Step 2. Select Add Exist Diagram
Step 1. From your Projects page, click the Add + button to the right of Diagrams
Step 2. Select Add Exist Diagram
Step 3. Check the box to the left of the diagram you would like to select
Step 4. Click OK
Step 5. Click your diagram to open it
Method 3: Opening Local Diagrams
Steps to use existing diagrams saved locally
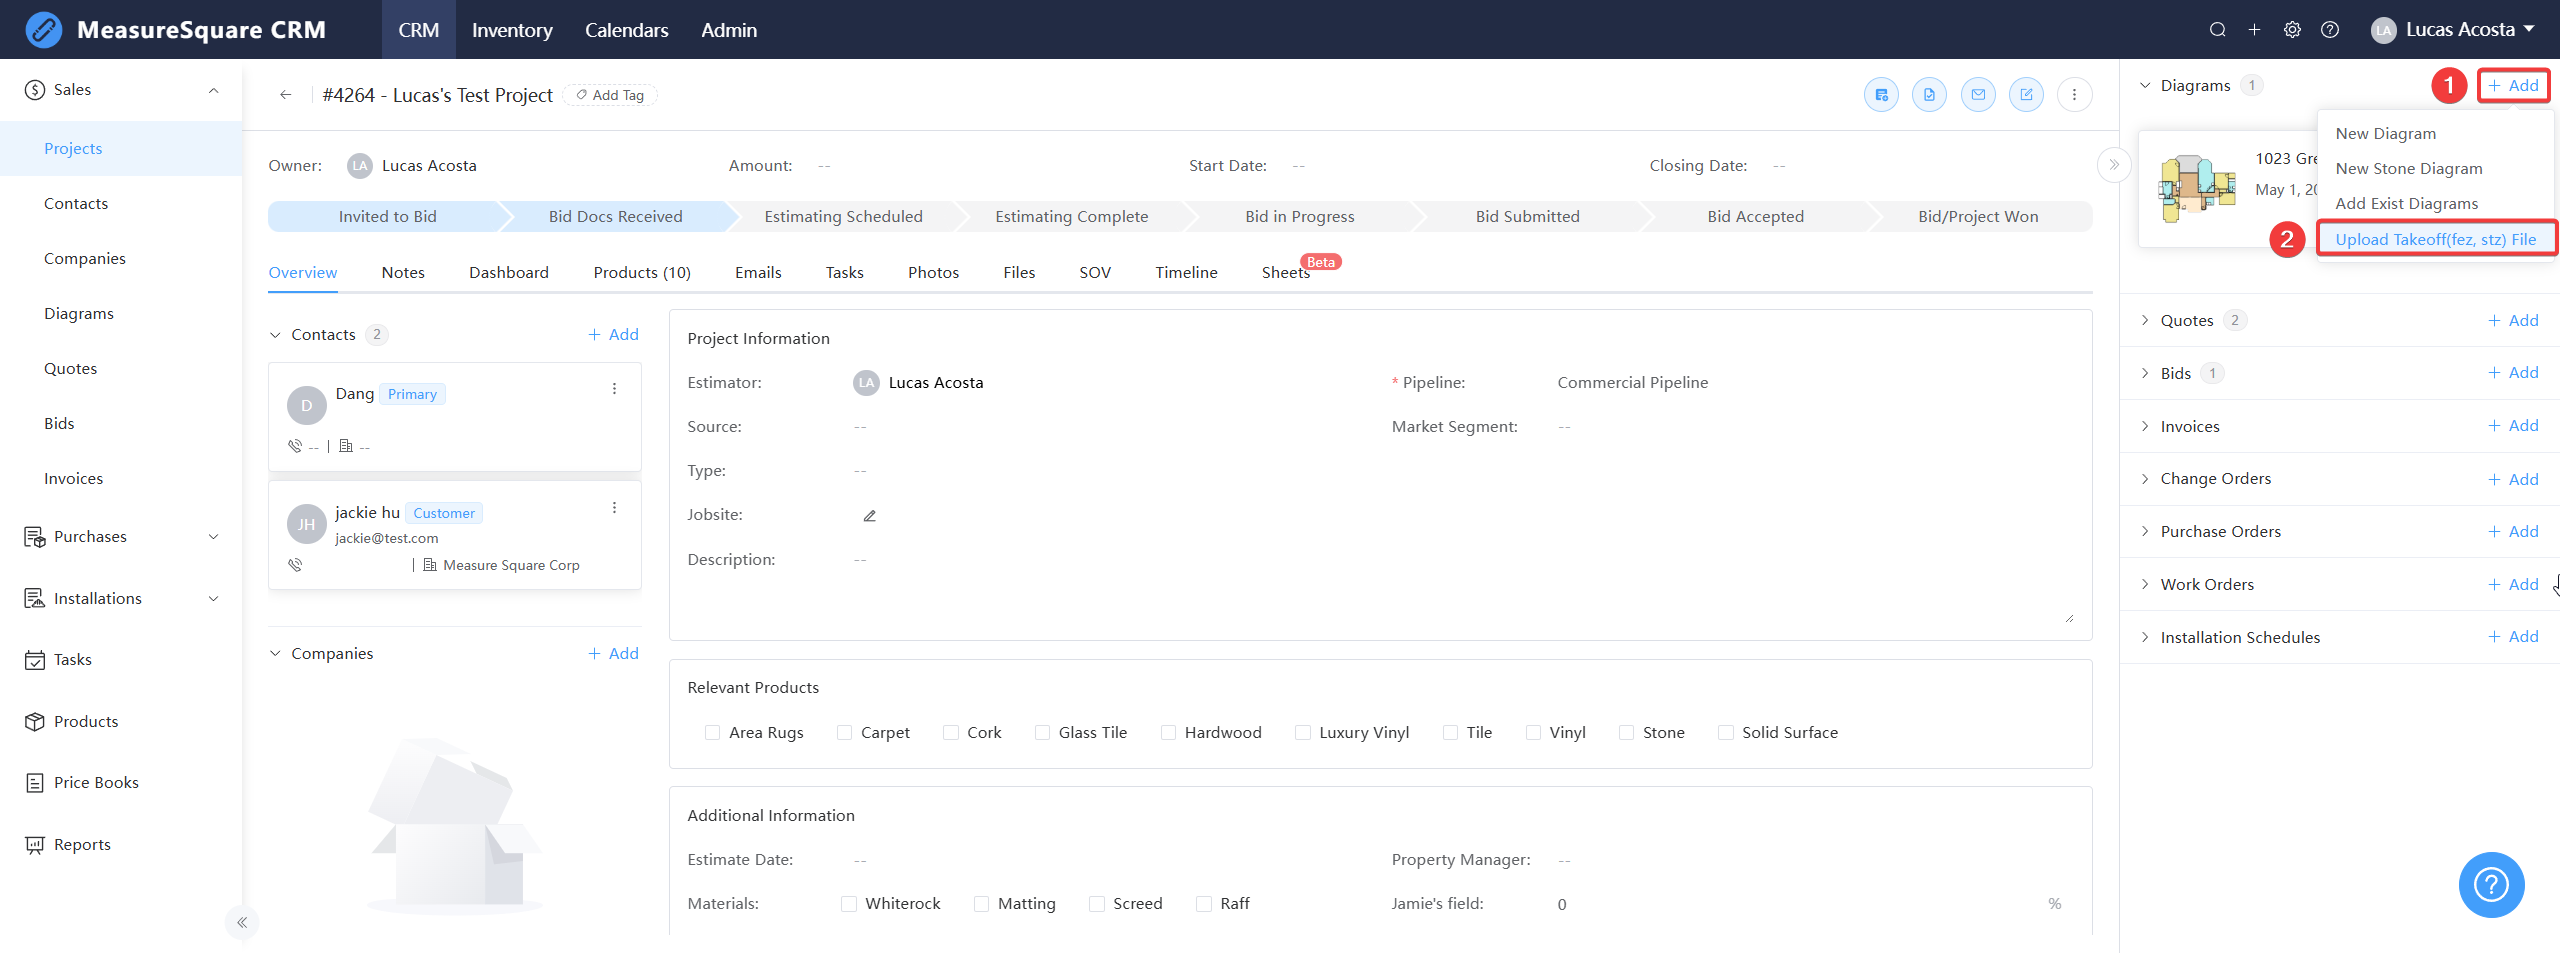
Step 1. From your projects page, click the + Add button to the right of Diagrams
Step 2. Select Upload Takeoff(fez,stz) File
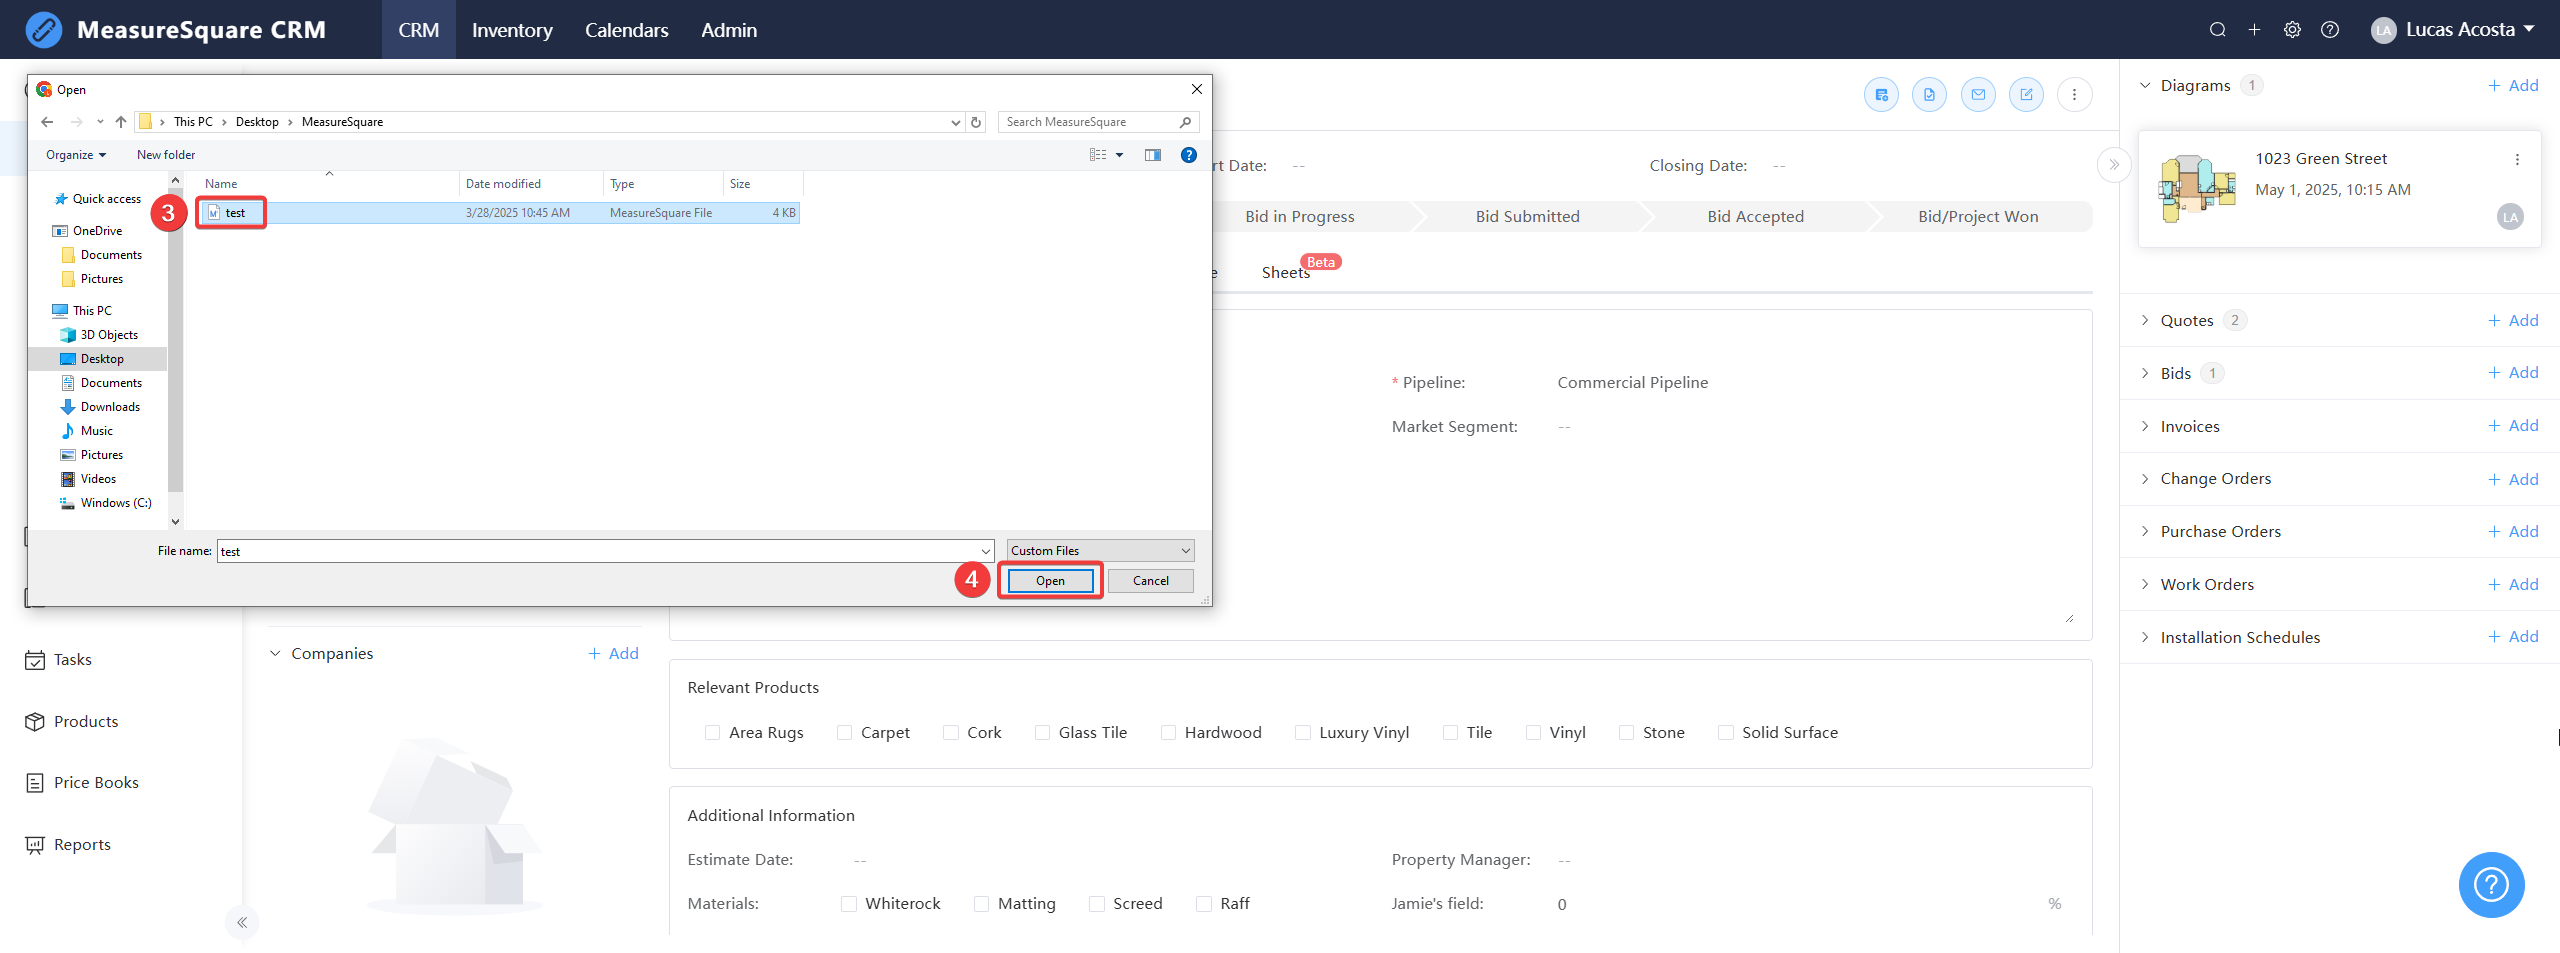
Step 3. Select your file
Step 4. Click Open
For any further questions, please reach out to our Support team
Monday - Friday from 7:30am-4:30pm PST: (626) 683-9188 ext. 3
All Hours: support@measuresquare.com
Monday - Friday from 7:30am-4:30pm PST: (626) 683-9188 ext. 3
All Hours: support@measuresquare.com
Related Articles
CRM User Manual: Takeoff/Bid Management, Lesson 1: Takeoff
MeasureSquare has been a leader in digital takeoff and estimating solutions for over 20 years. When paired with MeasureSquare CRM, your takeoff data becomes significantly more powerful, enabling automation, eliminating double-entry, and streamlining ...How to Import Diagrams into a CRM Project
How to Import Diagrams into a CRM Project In this article we will show how to attach Diagrams to a MeasureSquare CRM Project To attach Diagrams to your Project you select the + Add button in the Diagrams section of the right hand column of your ...How to set up a connection between M2Cloud Diagrams and CRM
In this article, we will cover how to set up a connection between diagrams in the M2Cloud and in MeasureSquare CRM. This article applies to MeasureSquare CRM. You can import your diagrams from MeasureSquare Cloud to MeasureSquare CRM. This process ...MeasureSquare CRM Implementation Checklist
A start-to-finish guide for your implementation manager Document File for the Implementation Checklist: CRM Implementation Checklist PHASE 0: Pre-Implementation Planning Complete before any configuration begins. Estimated time: 1–2 weeks. Strategic ...How do I manage my Project Providers and Project Subscribers on the MeasureSquare Cloud?
This article will show you how to manage your settings on The Cloud for the Project Subscribers and Providers. Being a Provider means that you are now able to automatically share your projects. When you sync to the cloud your diagrams will be shared ...