How to Create a Wall Opening in MeasureSquare 8?
This article will show you how to create a wall opening in your takeoff while using MeasureSquare 8 for Windows.
This article applies to MeasureSquare 8 software.
Step 1: From the Takeoff tab, click on the RmEdit dropdown menu and select Split Wall Segment.
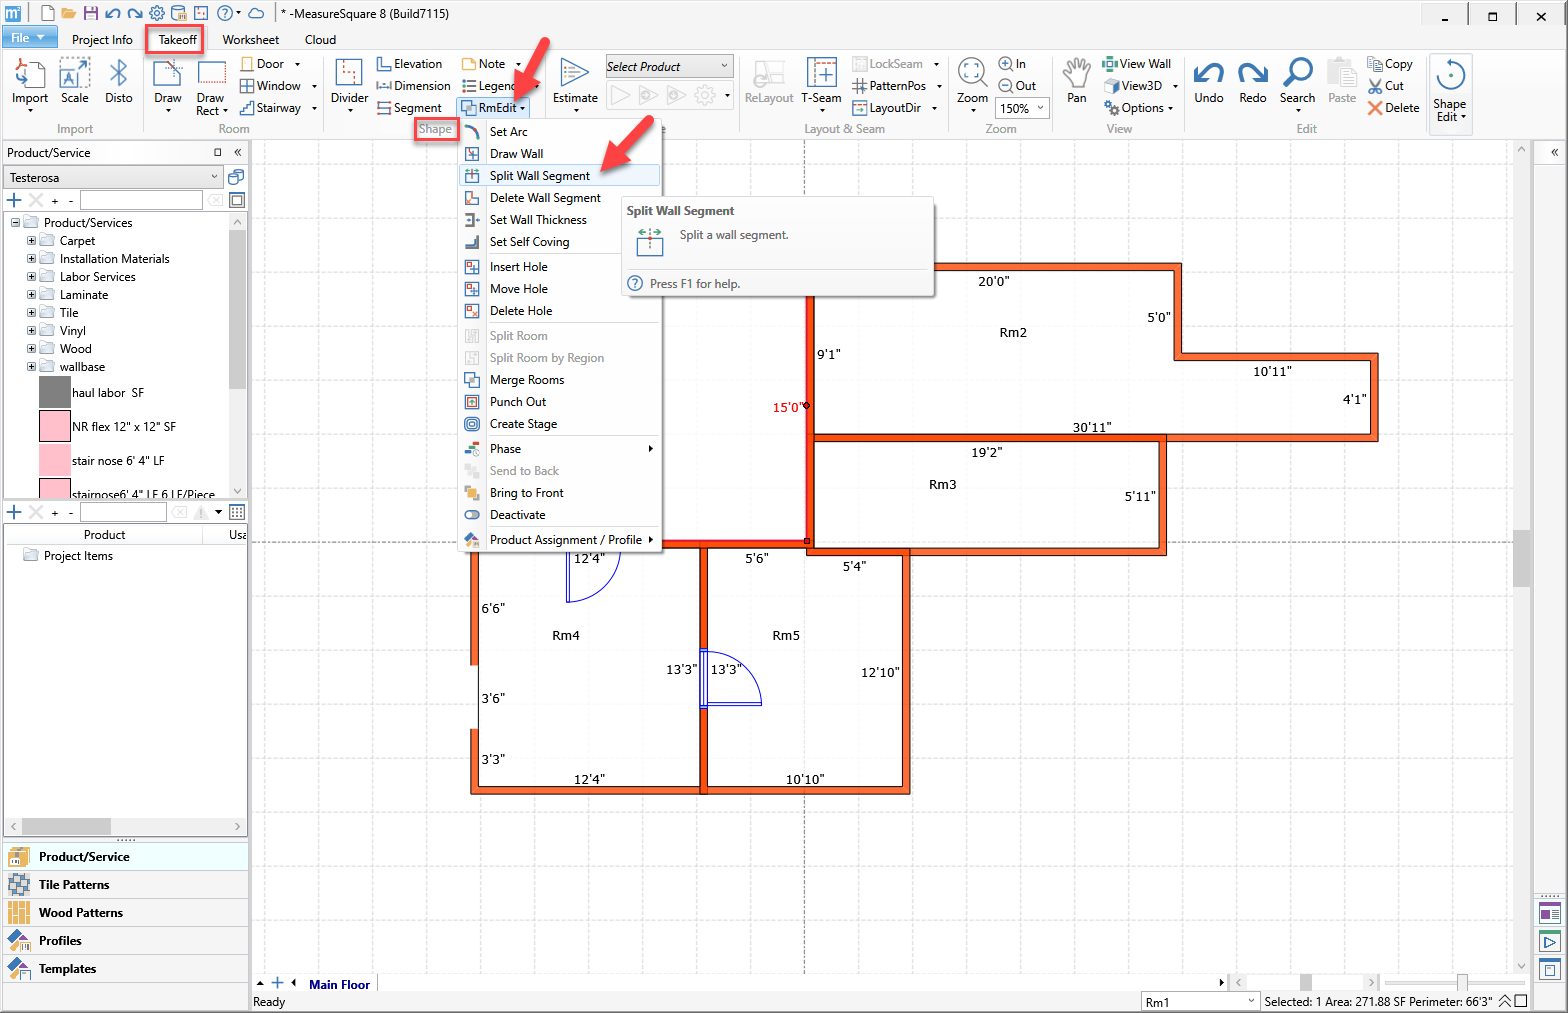
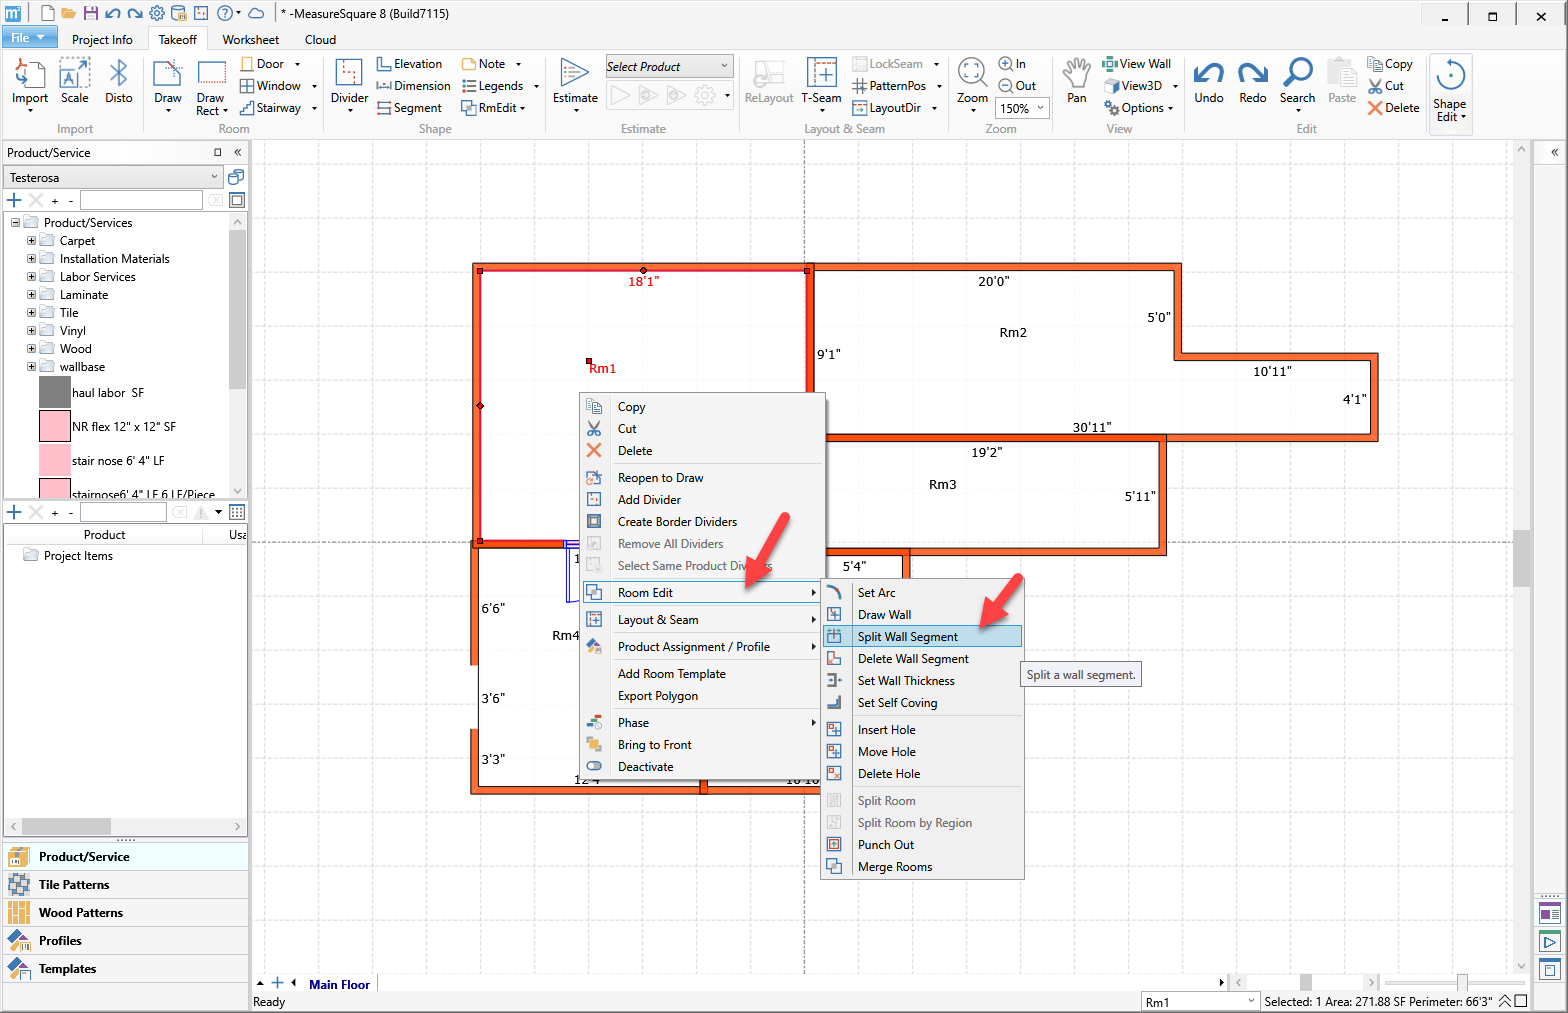
(Or you can also access the tool by right clicking in a room and selecting Room Edit, Split Wall Segment.)
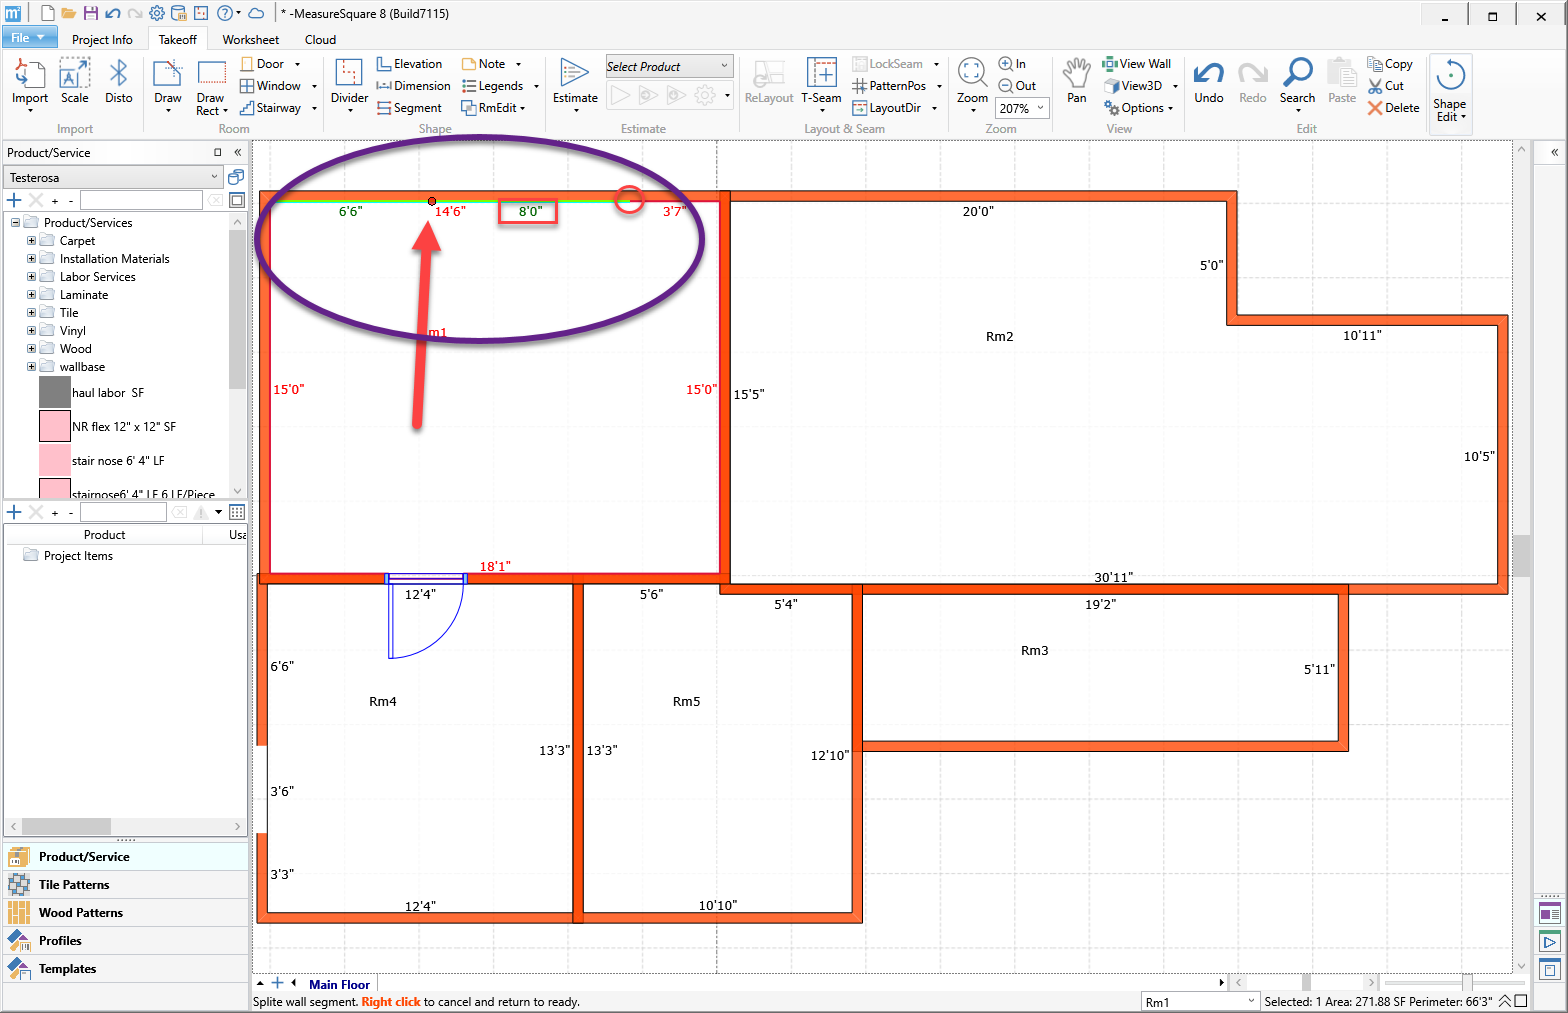
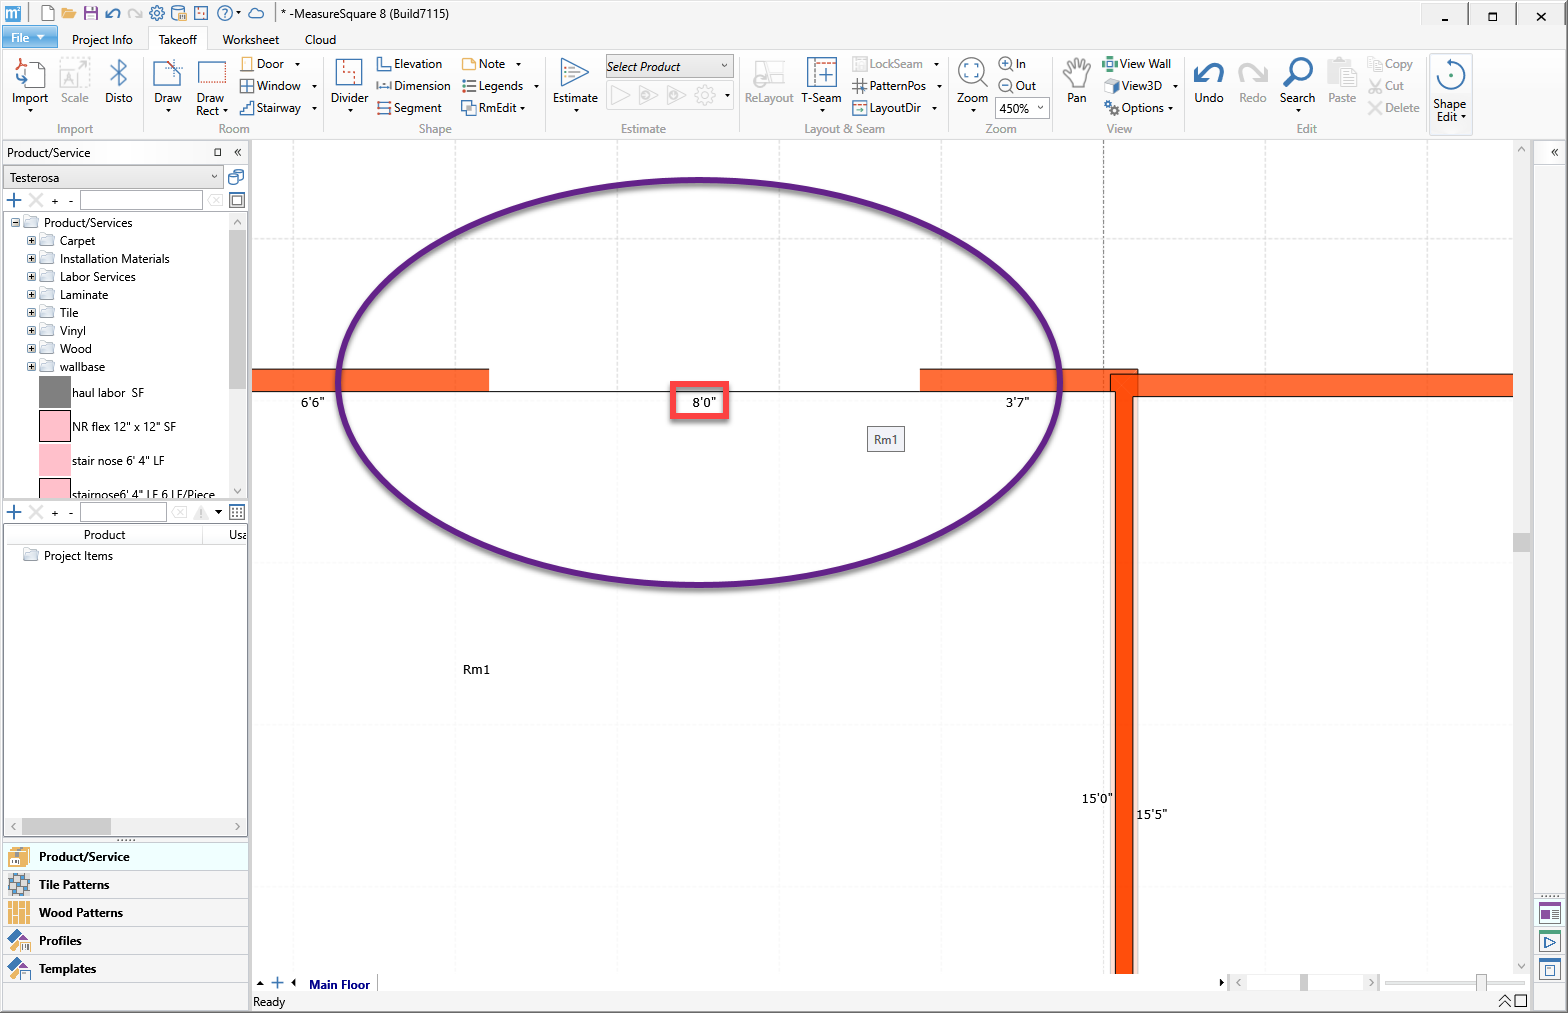
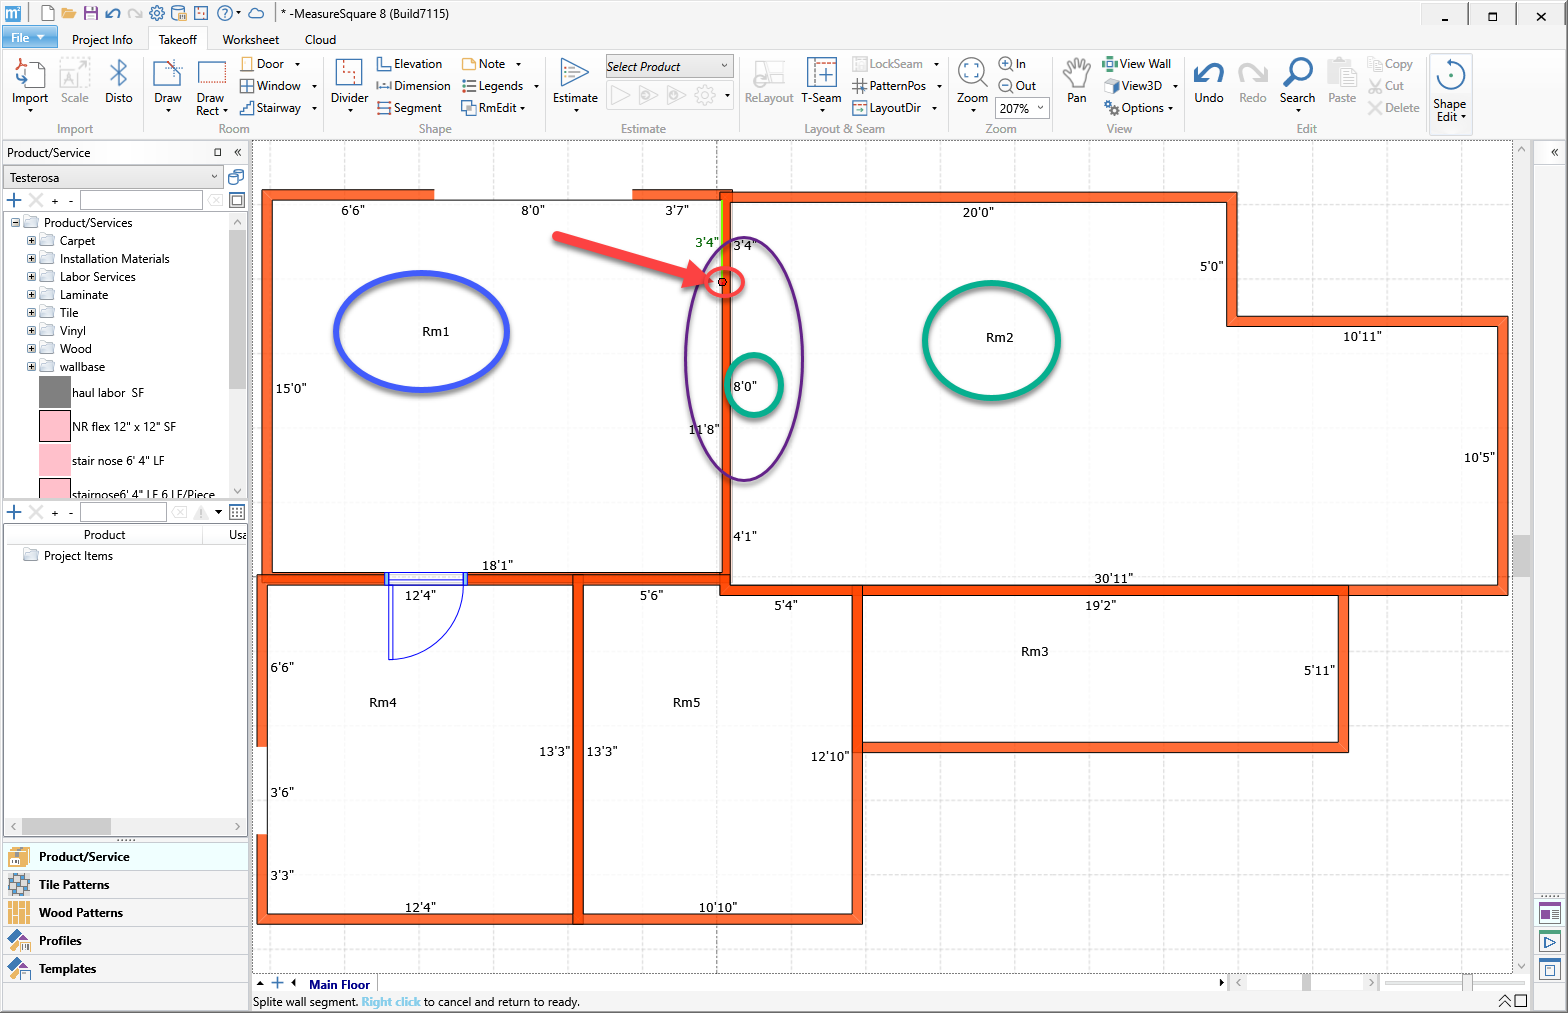
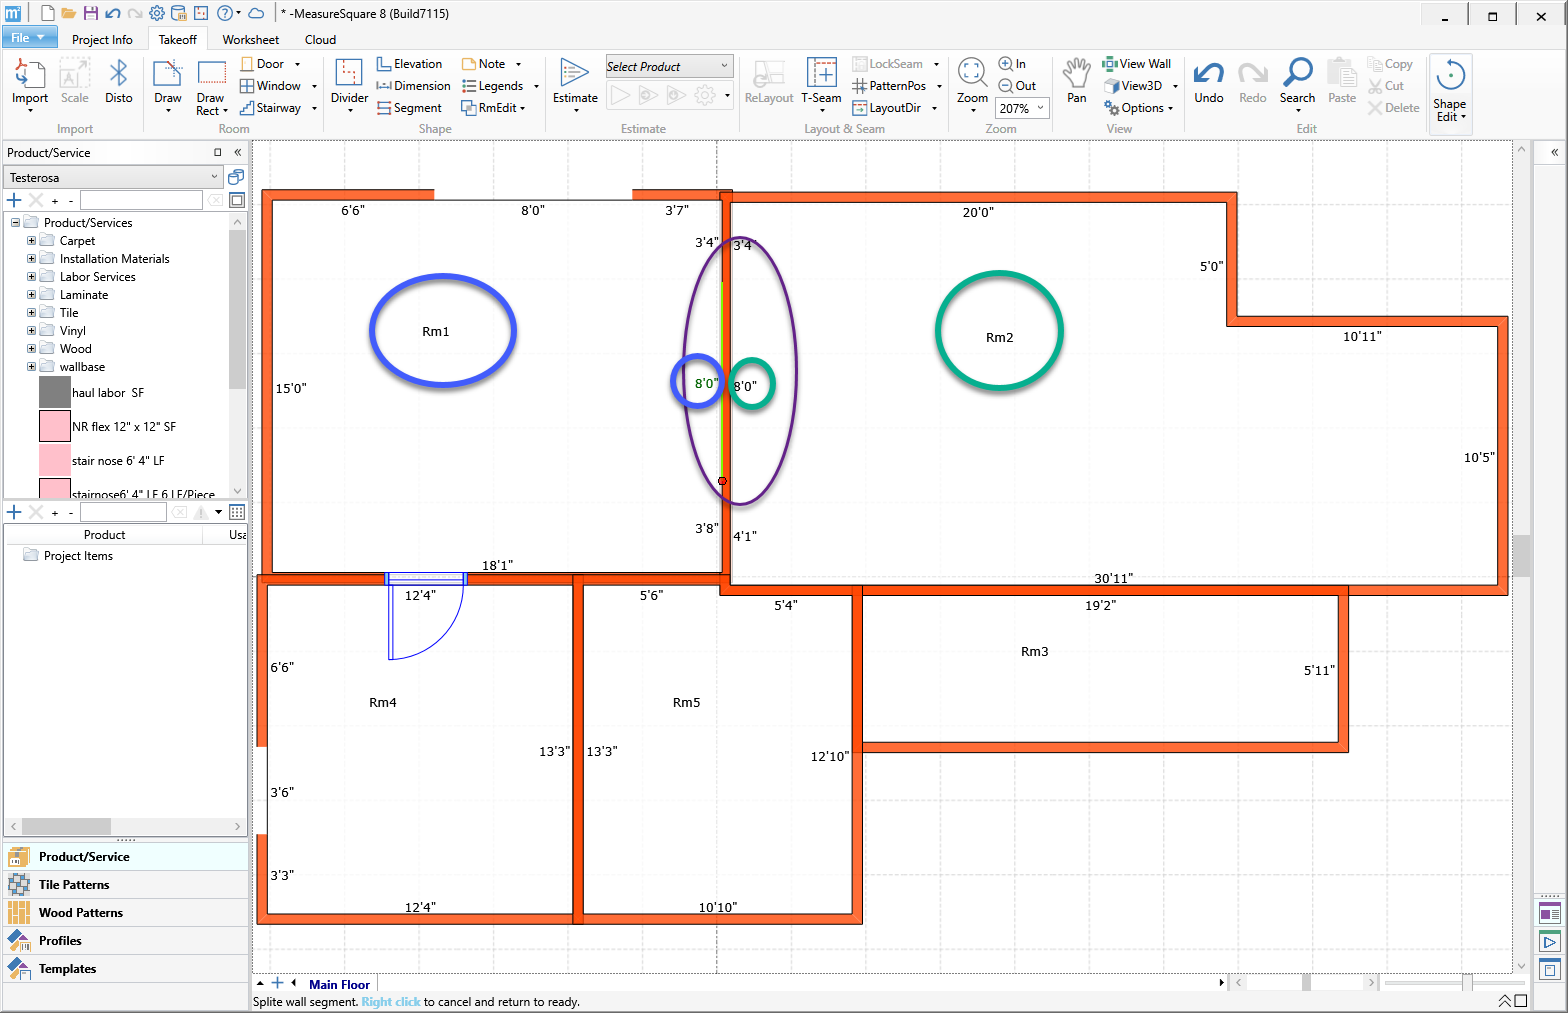
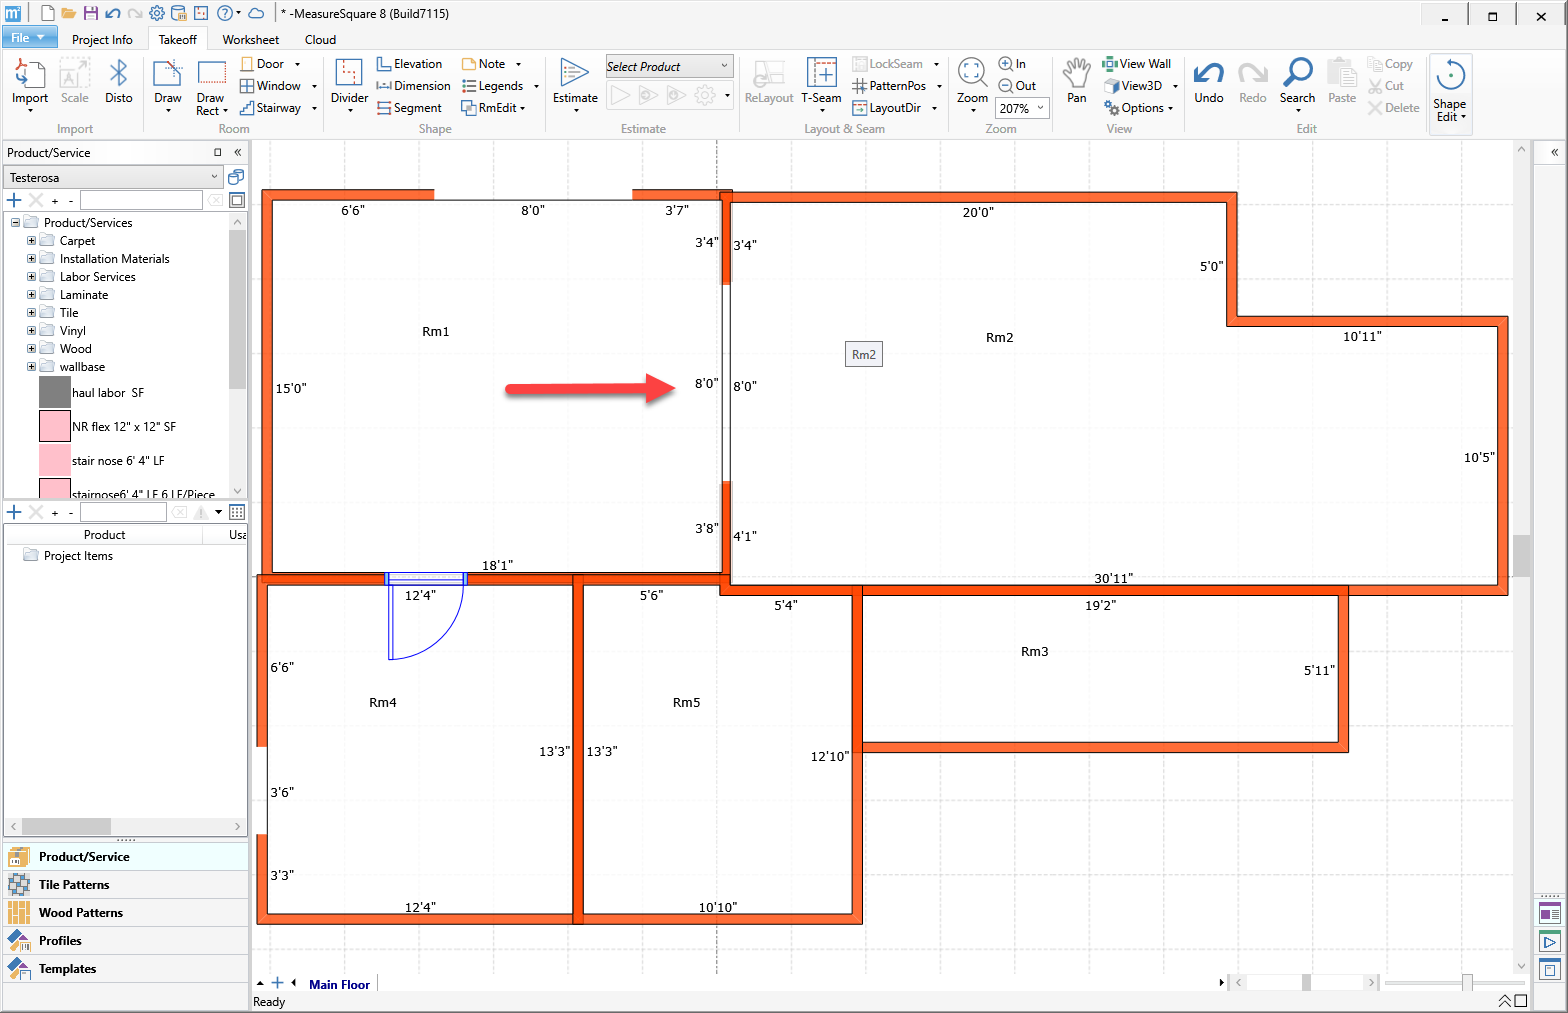
Step 2: To apply the tool hover over the wall until you get a Red Dot on your wall and the wall is highlighted green while showing dimensions. Left click to place your first wall segment, move your mouse along the wall until you have the dimensions you need and left click again to apply the second segment. Once you have added all your segments Right click on to exit the Split Wall Segment Tool mode.

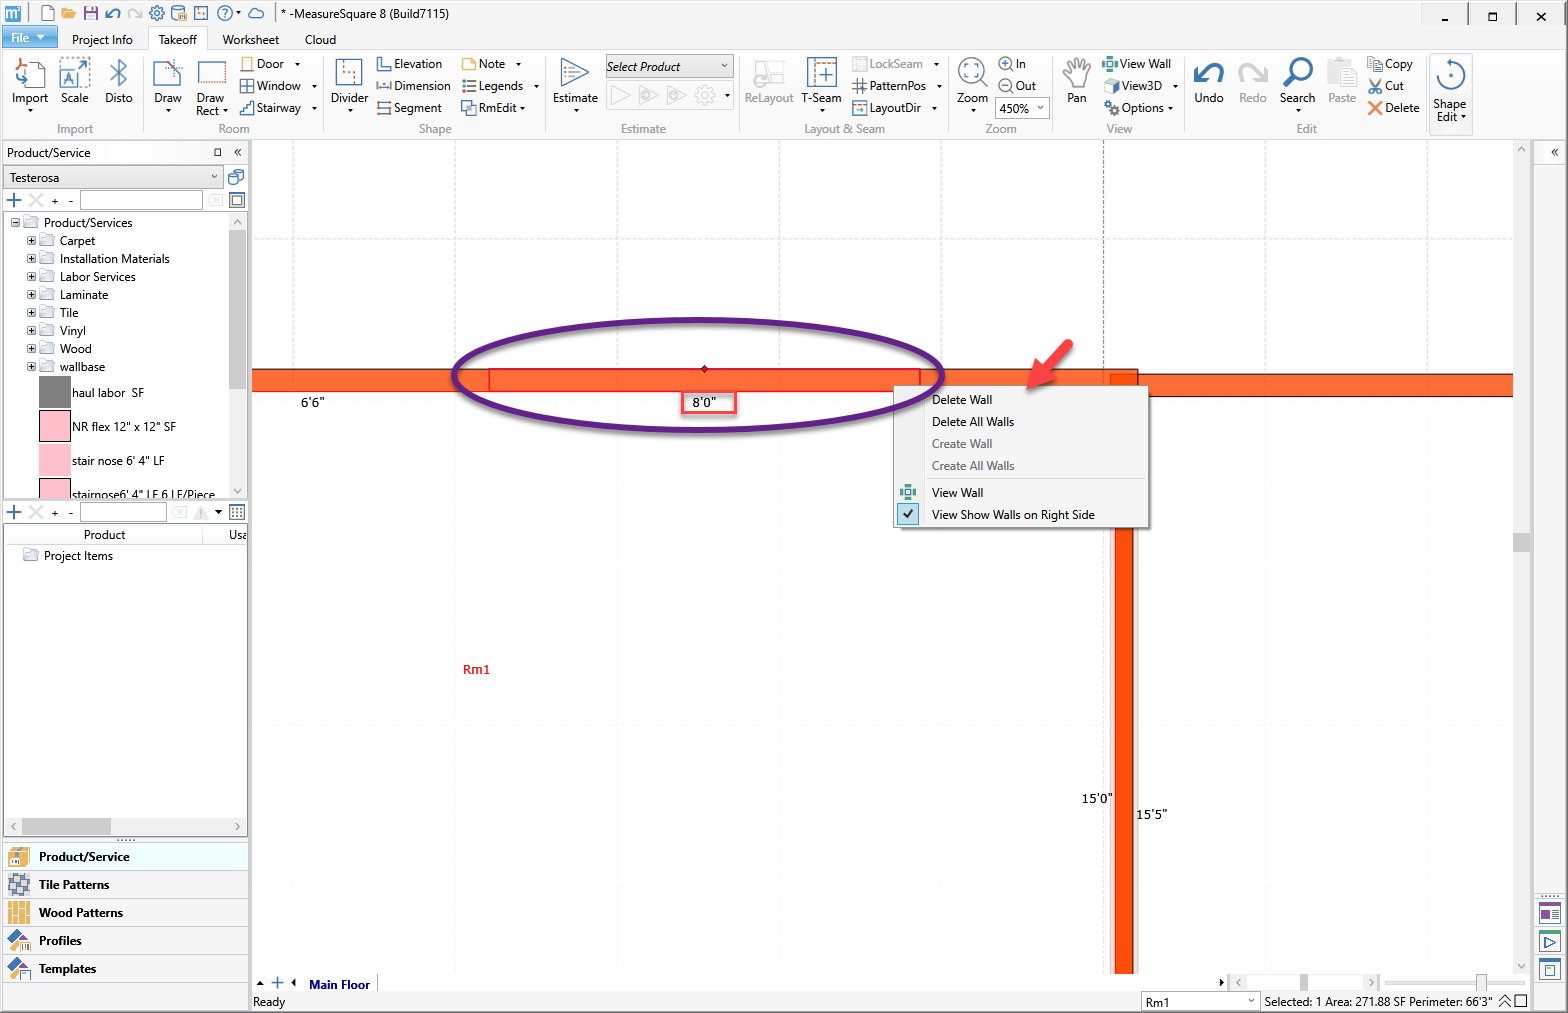
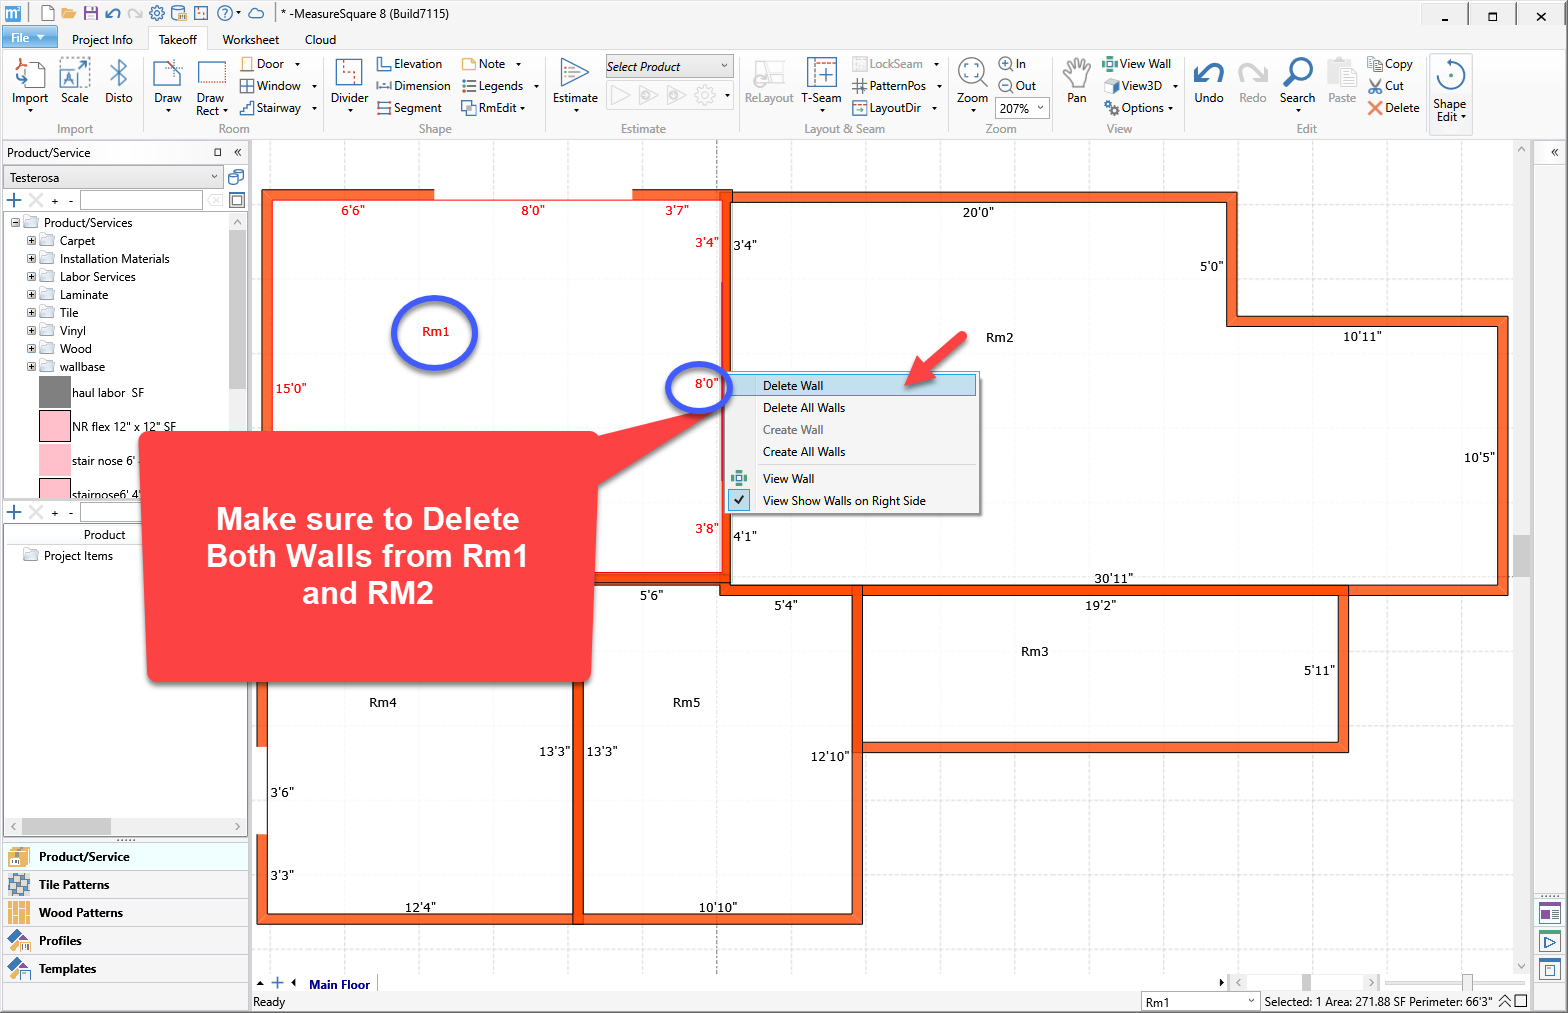
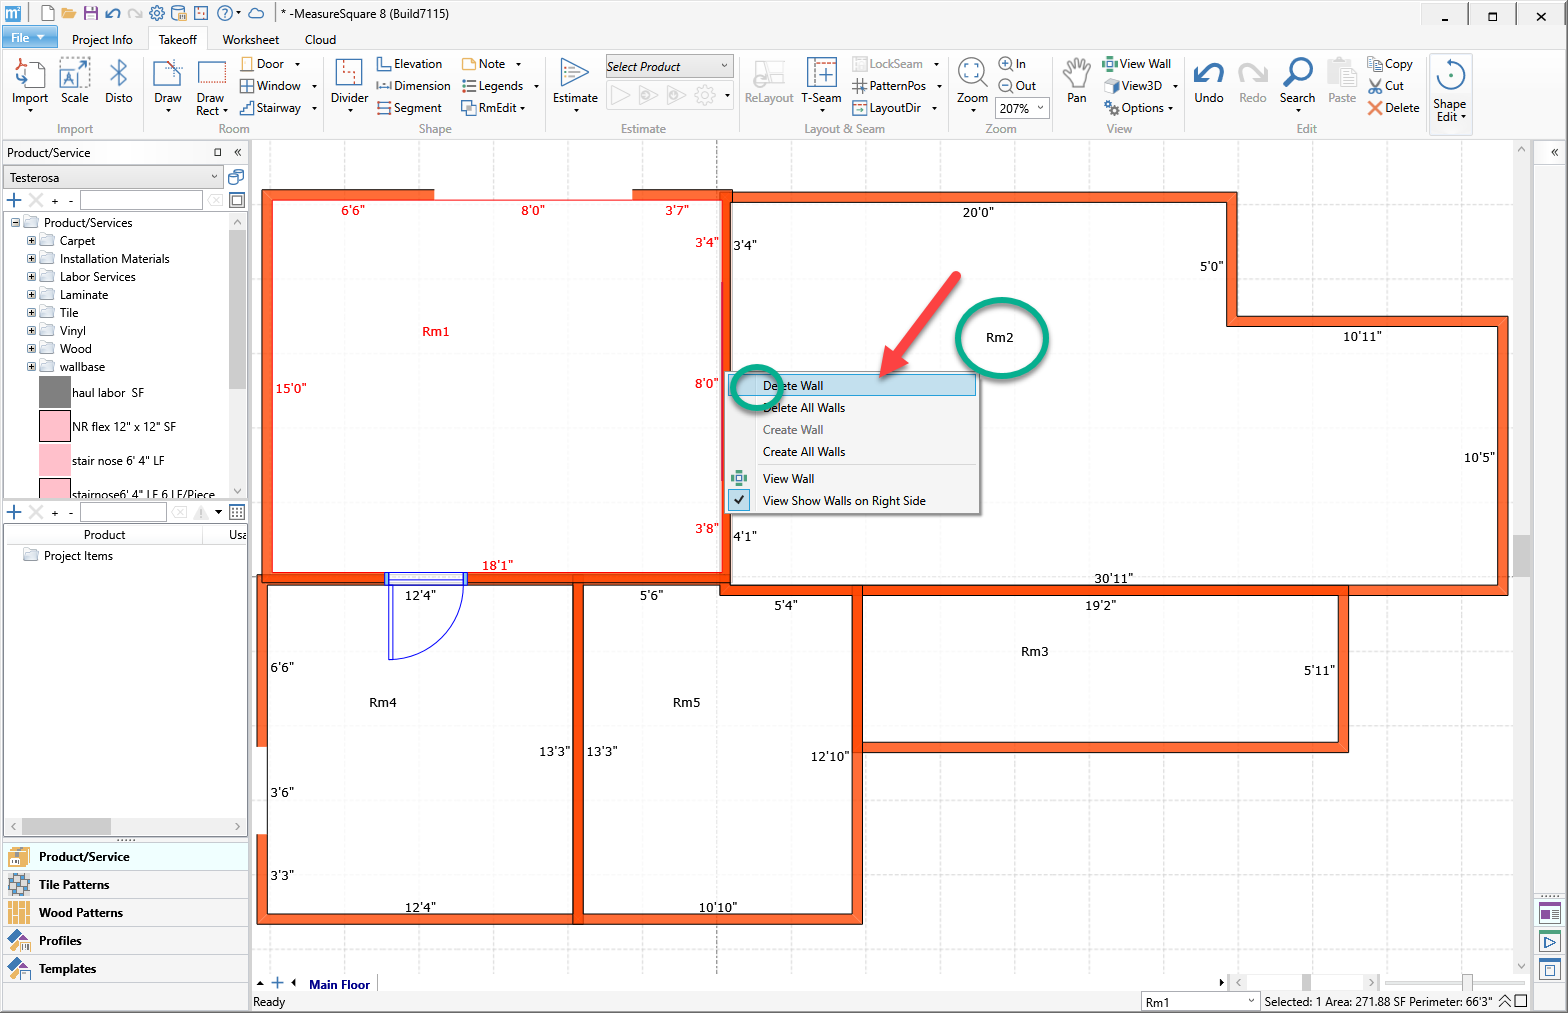
Step 3: Right click over the wall area you wish to make an opening and select Delete wall.
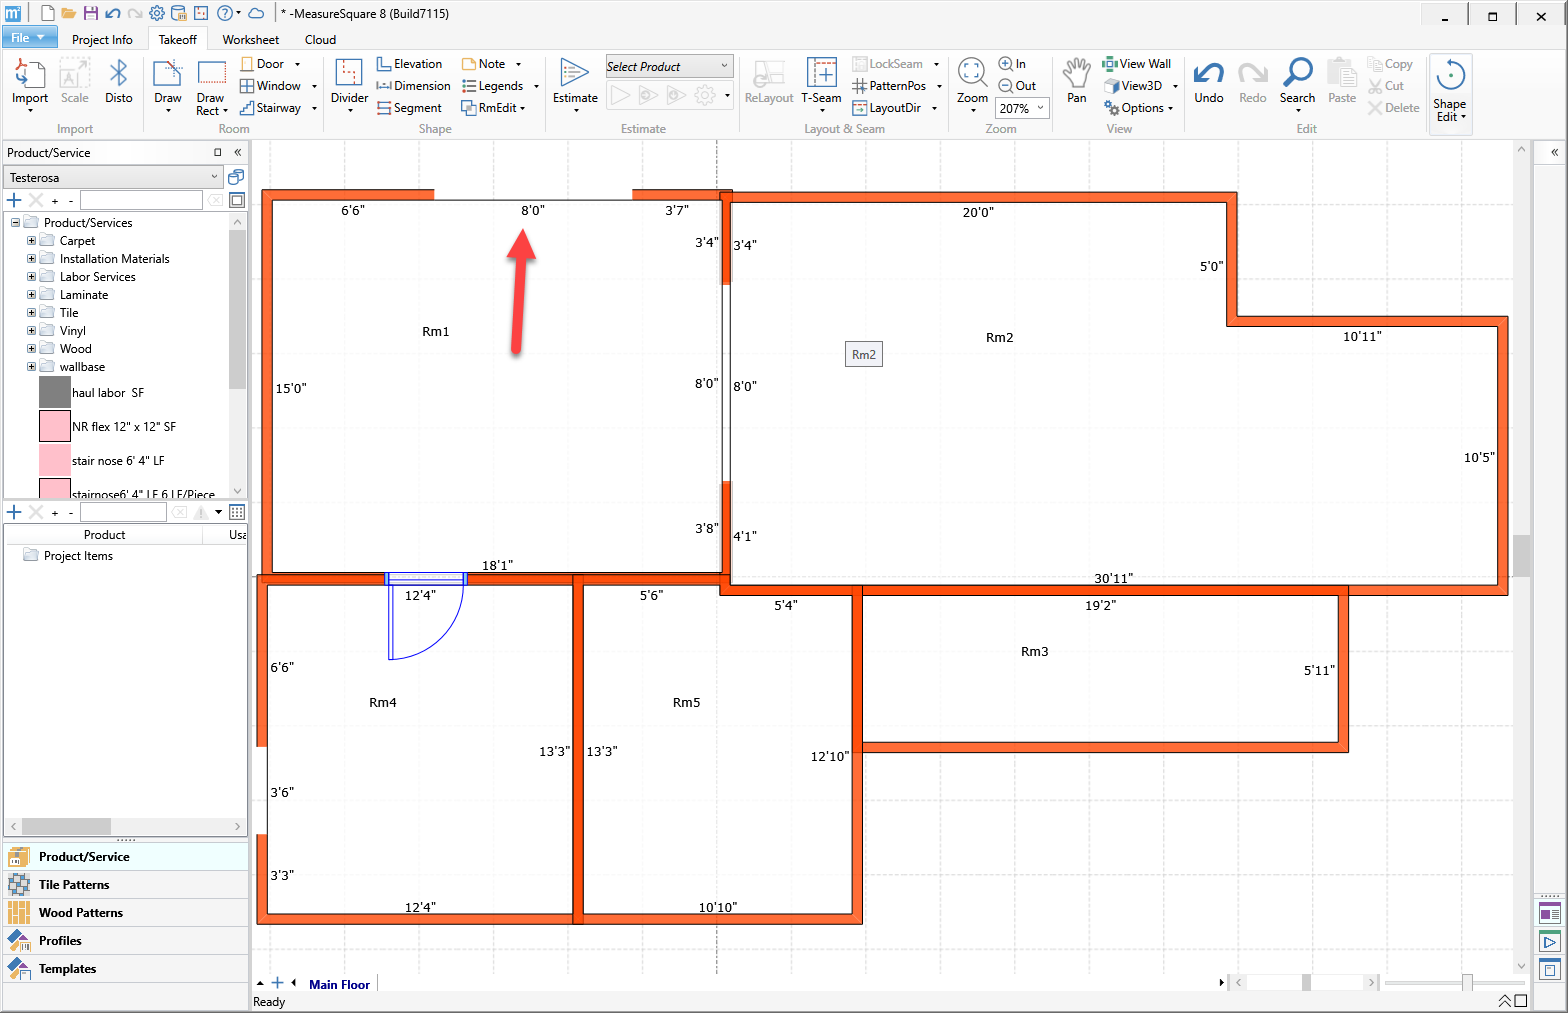
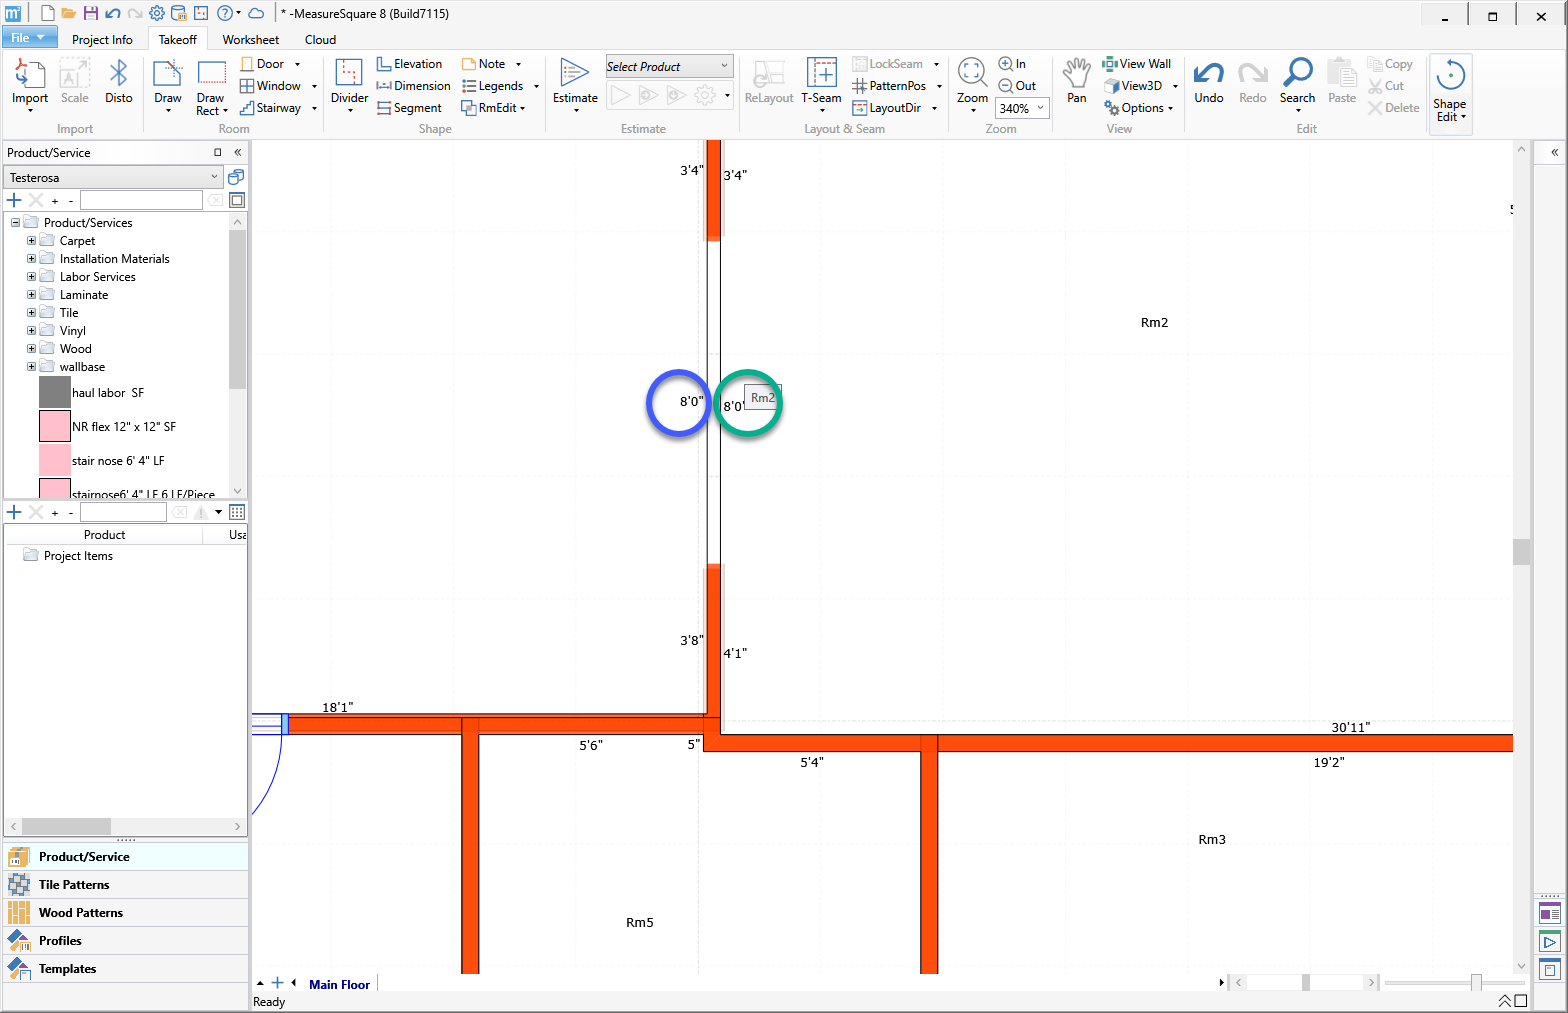
 Note: For a walls with a neighboring room you must apply the Split Wall Segments on both sides of the wall.
  Rm1 is overlapping with RM2 .The screenshots are below are color coded to show the same changes made to each room
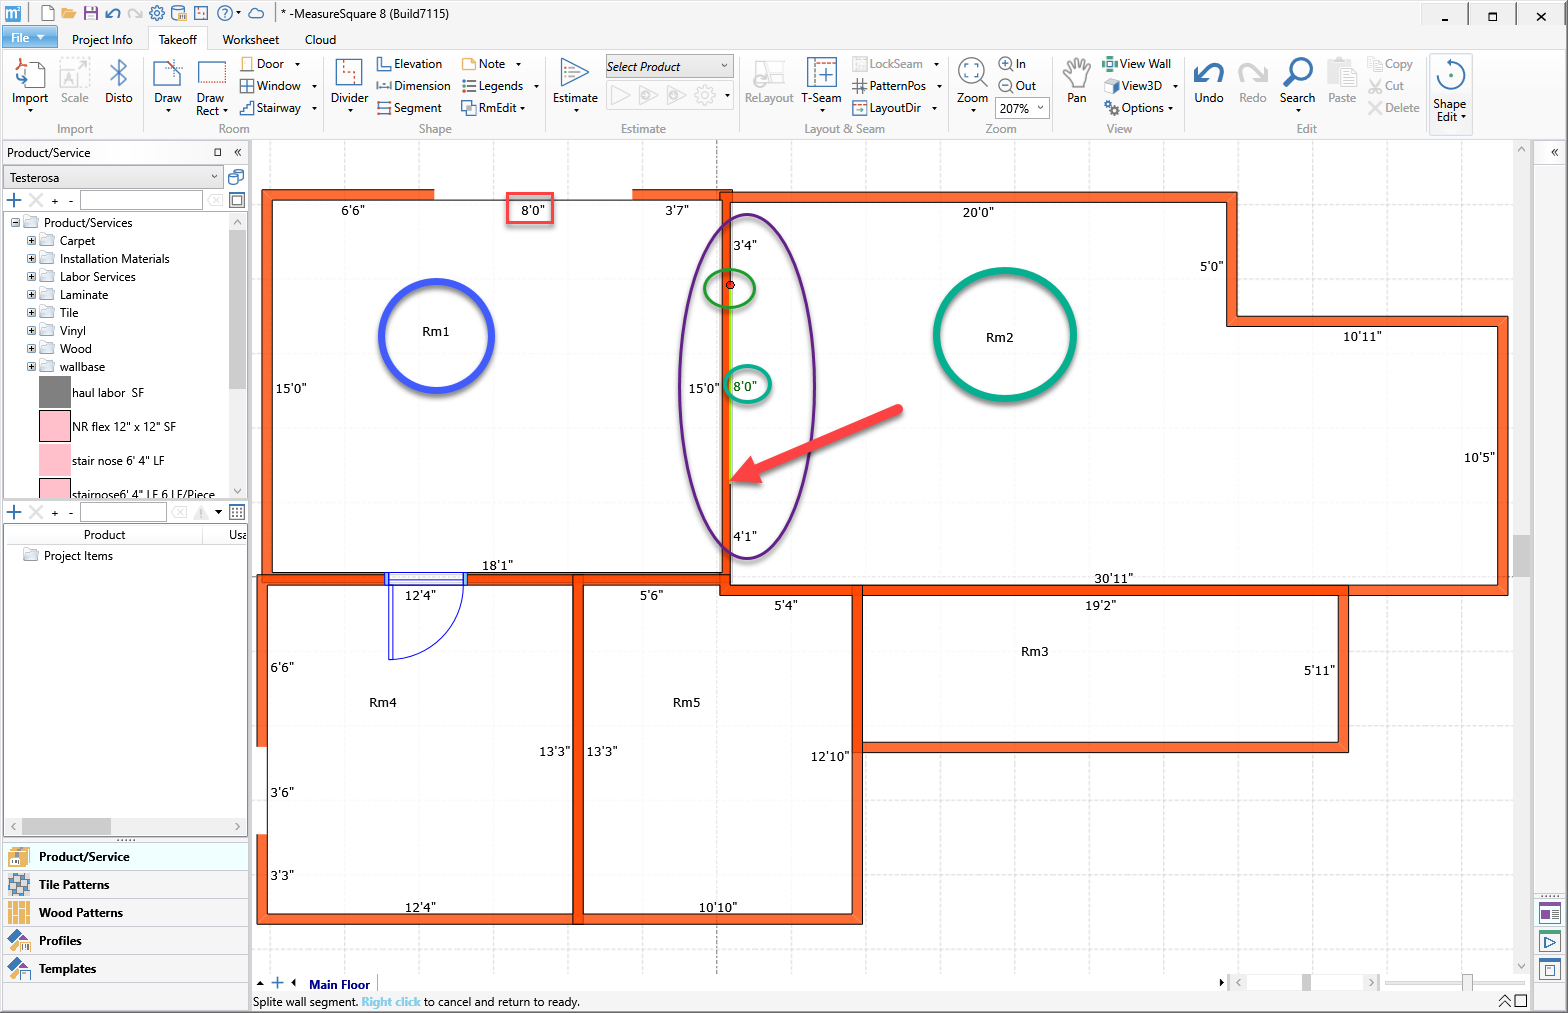
Related Articles
Creating and Opening Diagrams in MeasureSquare CRM (from M2web, Cloud, and Locally)
In this article, we will show you the features of the Diagrams module in MeasureSquare CRM. MeasureSquare CRM's diagram feature allows you to create simple floorplans up to 5,000SF using the new M2web tool (in beta), as well as import diagrams ...How do I free-draw a room with angles, doors, openings, or arc/curved wall in MeasureSquare Mobile for iPad?
This article applies to MeasureSquare Mobile App for IOS In this video, you will learn how to freedraw rooms with angles, opening, door, arc/curved walls. You will also learn a few tips that help draw more efficiently and smoothly, such as how to ...How do I add a doorway in MeasureSquare 8?
In this video we will cover how to insert doorways into a room in Measure Square 8. Version: This article applies to MeasureSquare 8 What are the benefits of using the Door tool? 1. Automatically trim the wall base 2. Automatically build the material ...How to Create Customize Fields in MeasureSquare CRM
In this article, we will cover how to create custom fields for different items in MeasureSquare CRM This article applies to MeasureSquare CRM. 1. From the homepage, click on your profile in the top right corner then click on Settings. 2. To add/edit ...How to edit wall profiles on MeasureSquare 8
In this article, you will learn how to edit and apply products on a wall on MeasureSqaure 8. Step 1: turn on the "View wall" option at the top toolbar. Step 2: click on the room --> right-click on one of the walls that show up on the right side -- > ...