How to create a custom hardwood or laminate pattern in MeasureSquare 8
This article will instruct you on creating a custom hardwood or laminate pattern in MeasureSquare 8
Method 1: Editing wood pattern templates
Step 1. Click the blue plus button to create a base product
Step 2. Label the product, then select Laminate or Hardwood as the type and click OK
Step 2. Label the product, then select Laminate or Hardwood as the type and click OK
Step 3. Click the Wood Patterns section to view available wood pattern templates
Step 4. Click and drag a template
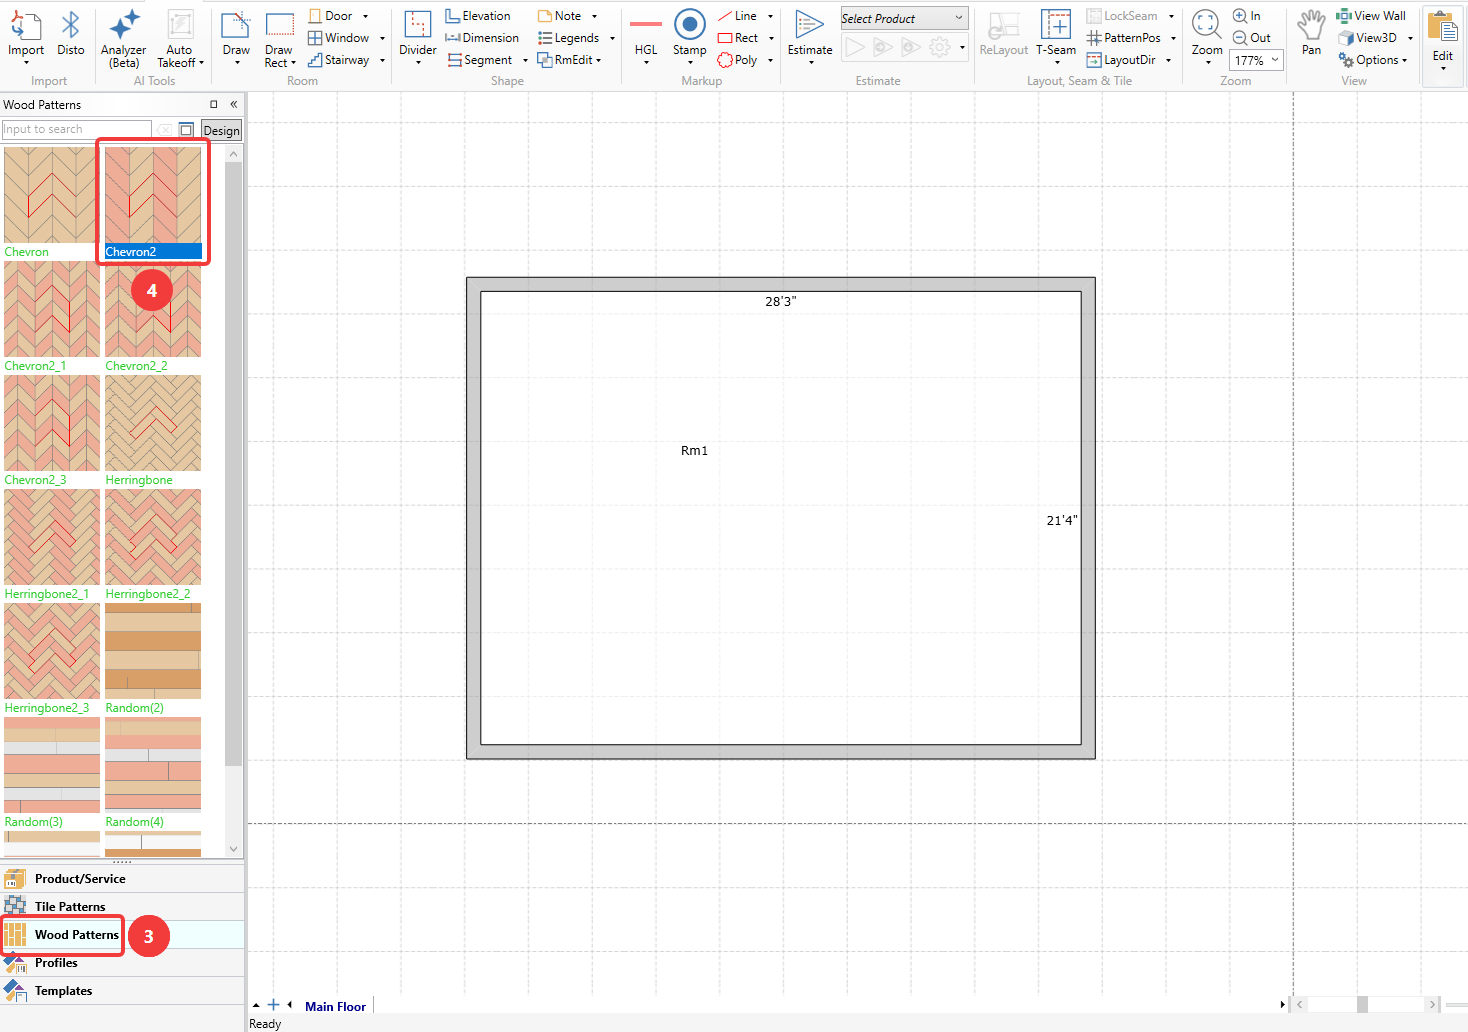
Step 4. Click and drag a template
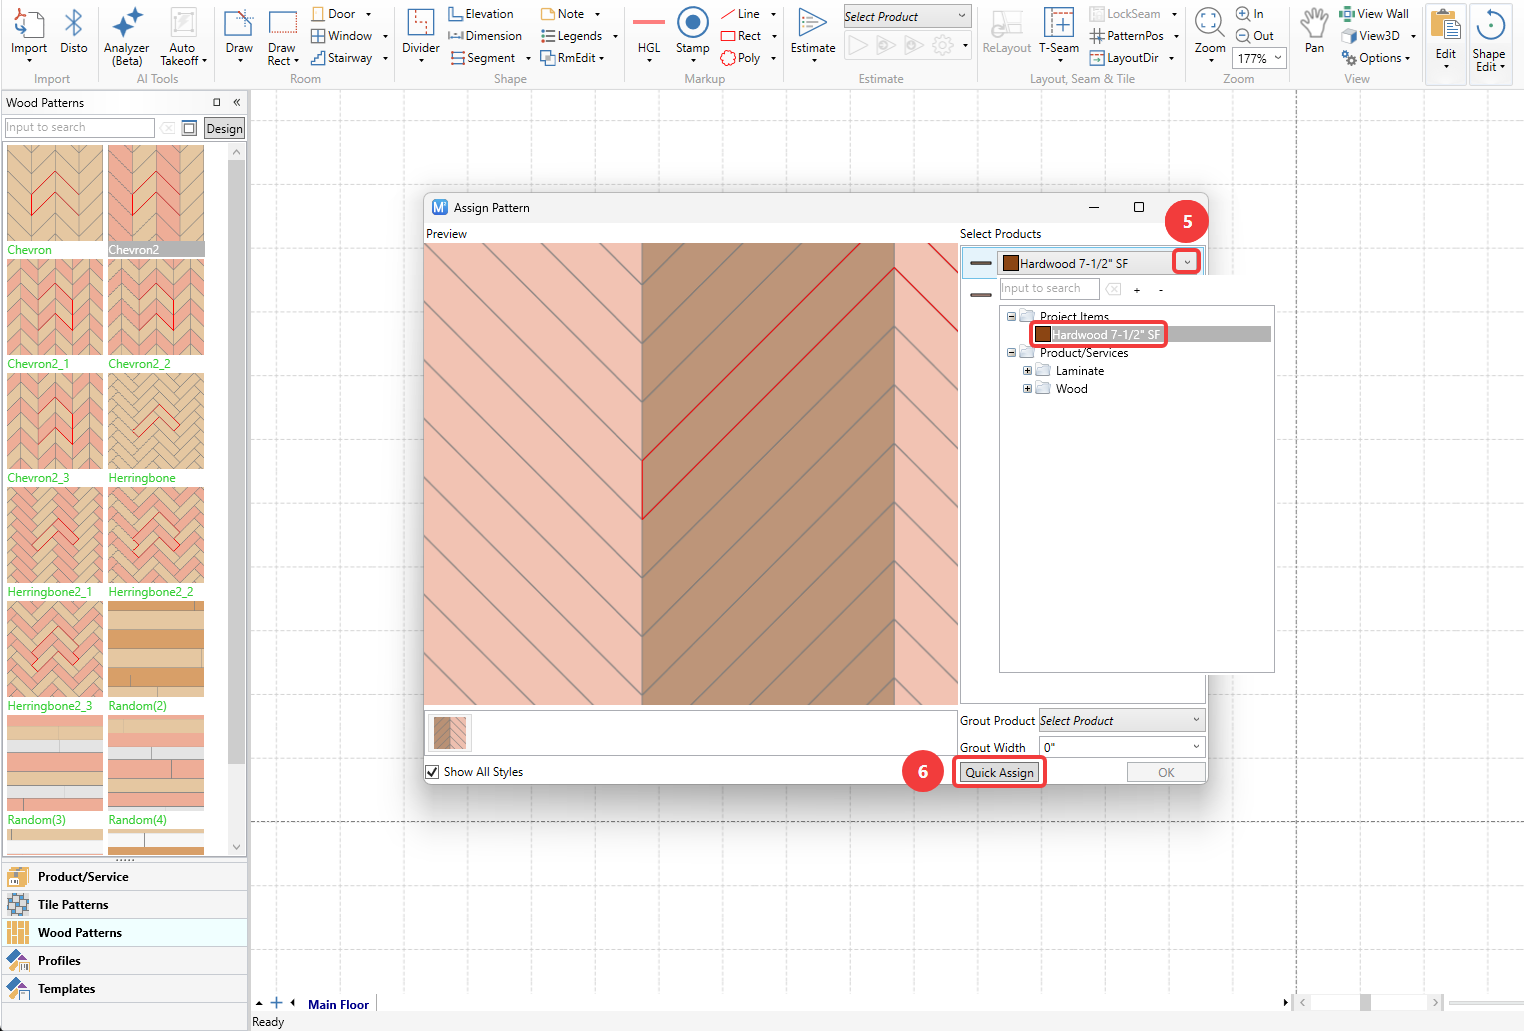
Step 5. Click the dropdown for the first product and select the product you just created
Step 6. Click Quick Assign and left click a room to assign the pattern to it
Method 2: Designing a pattern from scratch
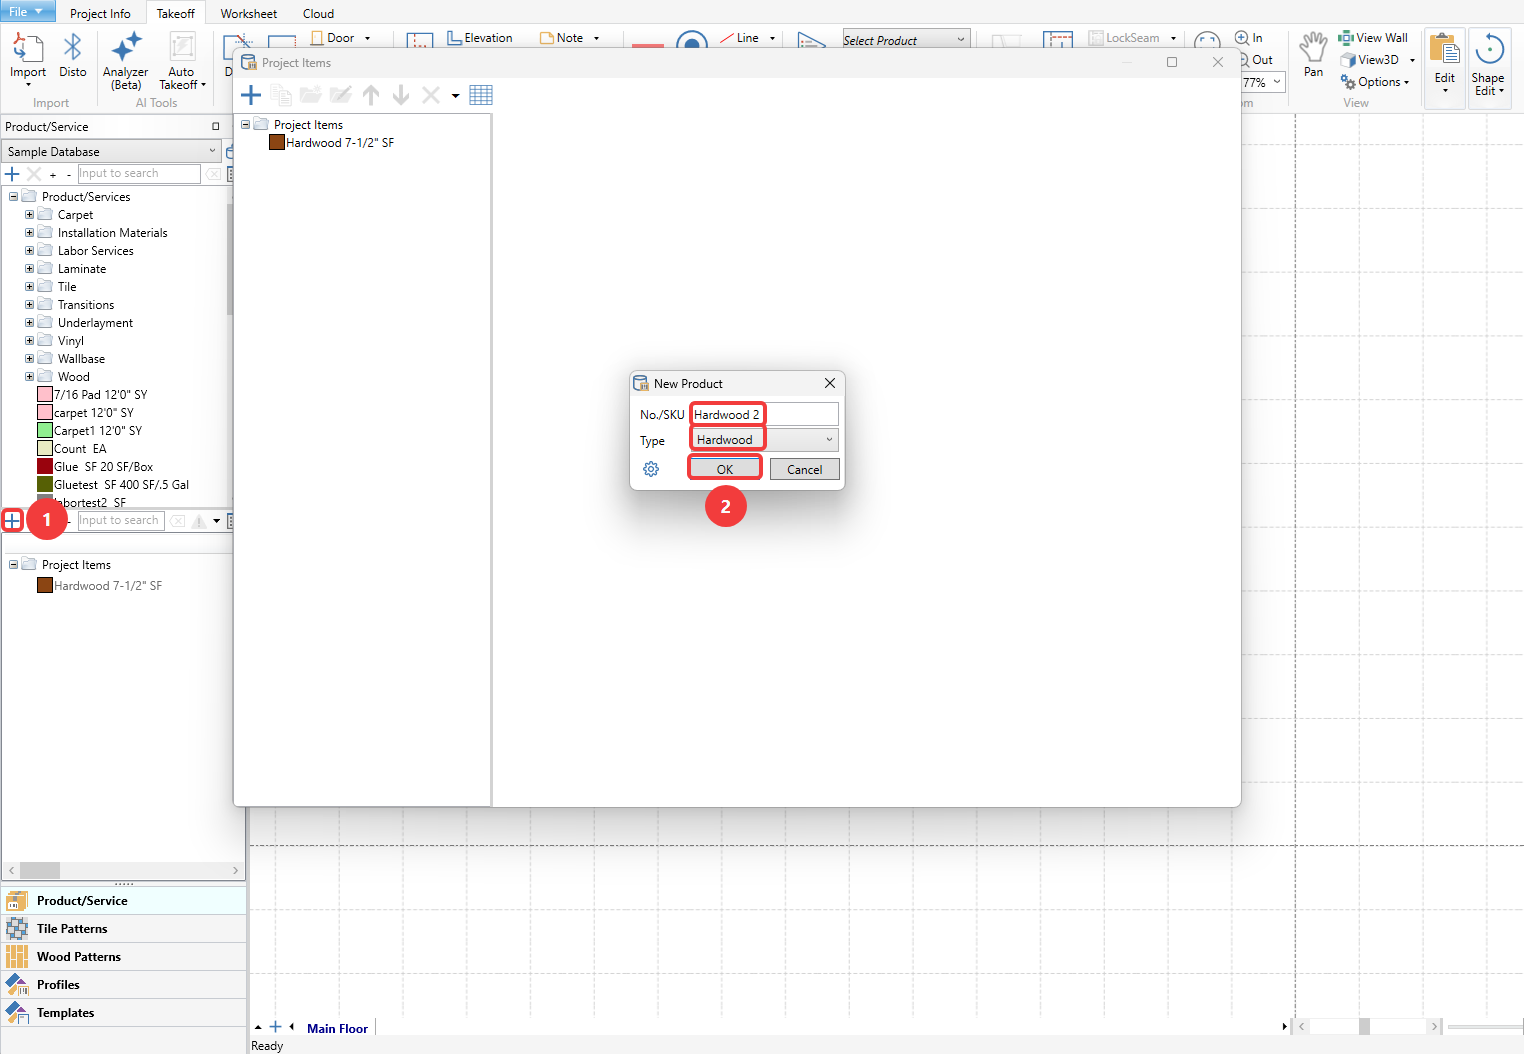
Step 1. Click the blue plus button to create base products
Step 2. Label, then select Laminate or Hardwood as the type for each product and click OK
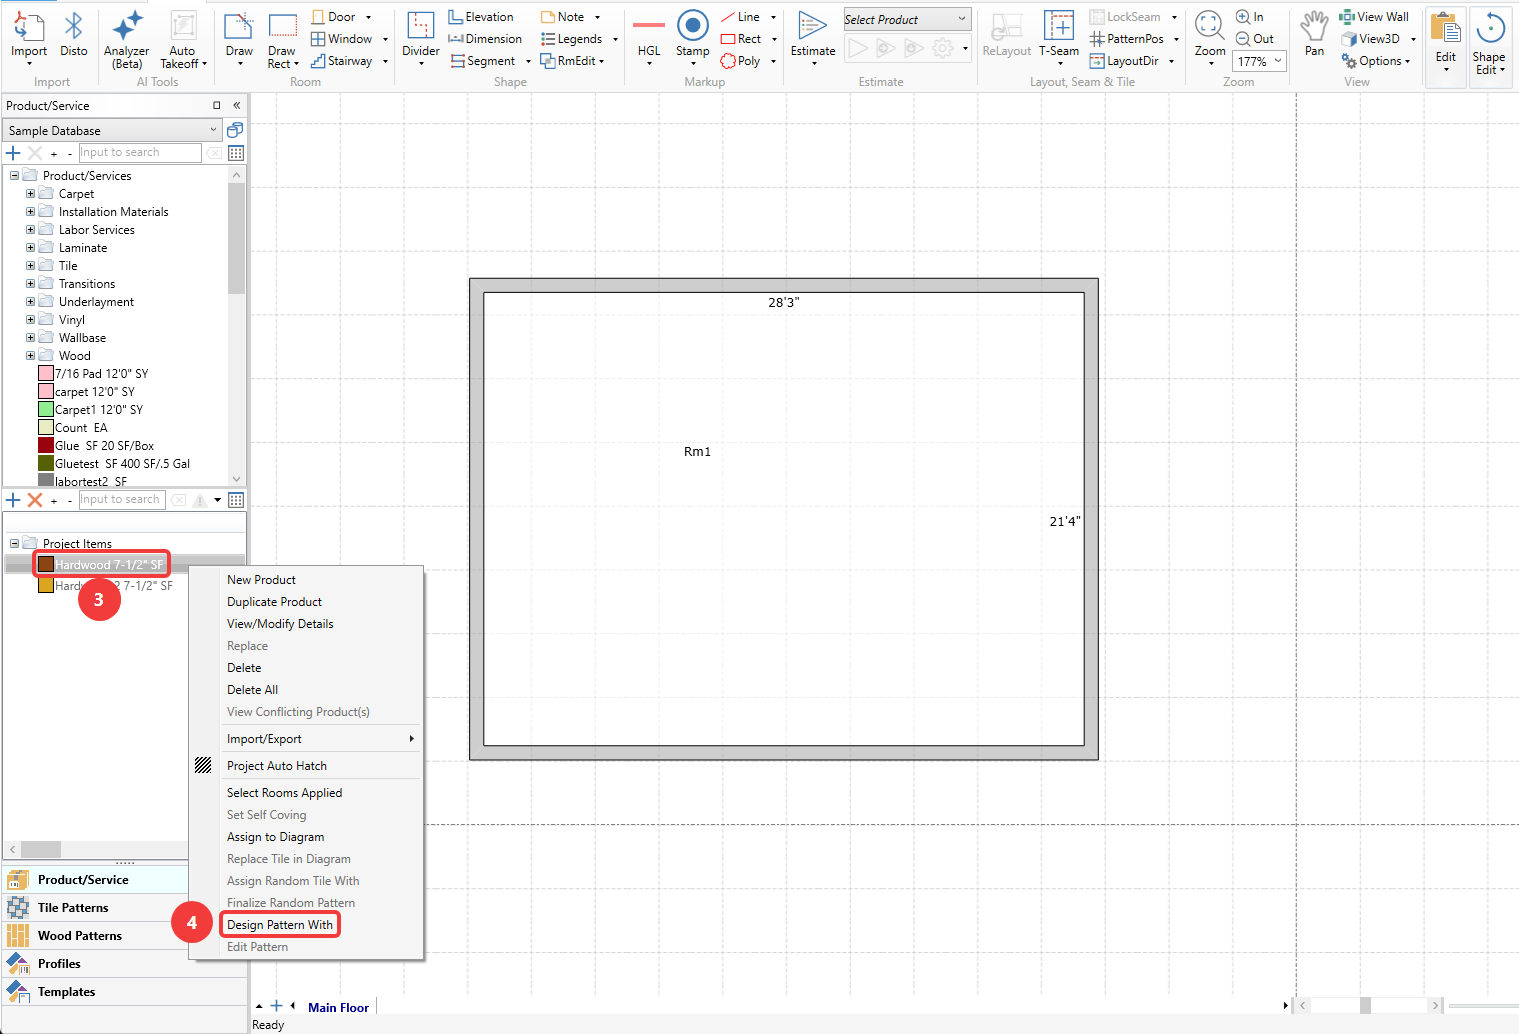
Step 3. Right click one of the products
Step 4. Select Design Pattern With
Step 5. Click the button with the yellow grid to add a new product
Step 6: Select the second product you created
Step 6. Click Quick Assign and left click a room to assign the pattern to it
Method 2: Designing a pattern from scratch
Step 1. Click the blue plus button to create base products
Step 2. Label, then select Laminate or Hardwood as the type for each product and click OK
Step 3. Right click one of the products
Step 4. Select Design Pattern With
Step 5. Click the button with the yellow grid to add a new product
Step 6: Select the second product you created
Step 7. Snap the pieces together by dragging them from a red square handle.
The toolbar at the top of the window allows you to add, duplicate, delete, rotate, or edit pieces/set an offset as needed. In the example below, I used the rotate selected piece counterclockwise button to rotate the second piece 90 degrees.
Note: If snapping to a corner, use the corner handle closest to the corner you would like to snap to. If snapping to a side, use the handle at the center of the line closest to the other piece.
Once your pattern is good to go, click Save to Project to save the pattern to your Project Items list.
The toolbar at the top of the window allows you to add, duplicate, delete, rotate, or edit pieces/set an offset as needed. In the example below, I used the rotate selected piece counterclockwise button to rotate the second piece 90 degrees.
Note: If snapping to a corner, use the corner handle closest to the corner you would like to snap to. If snapping to a side, use the handle at the center of the line closest to the other piece.
Once your pattern is good to go, click Save to Project to save the pattern to your Project Items list.
Step 8. Label the pattern and click OK
Step 9. Click a room/area to apply the pattern