How to add QR code on my report on Measure Square Mobile
In this article we will go through the necessary steps to have a QR code Included at the top of your report
This article applies to MeasureSquare Mobile on iPad
Step 1: Sync your Project to MeasureSquare Cloud
1a: From the Home Page, select the Sync button in the top right corner

For Reports > Forms
Step 2: From your Form, select Preview (eyeball icon) at the bottom
Step 3: Select the Gear Icon and then Print Settings
Step 4: Toggle on the Print Web Viewer Url and then adjust the displays for Quantity, Area/Perimeter, Dimensions, and Blue Print based on how much information you would like available from the link.
For Reports > Print
Step 2: Select the Gear Icon and then Settings
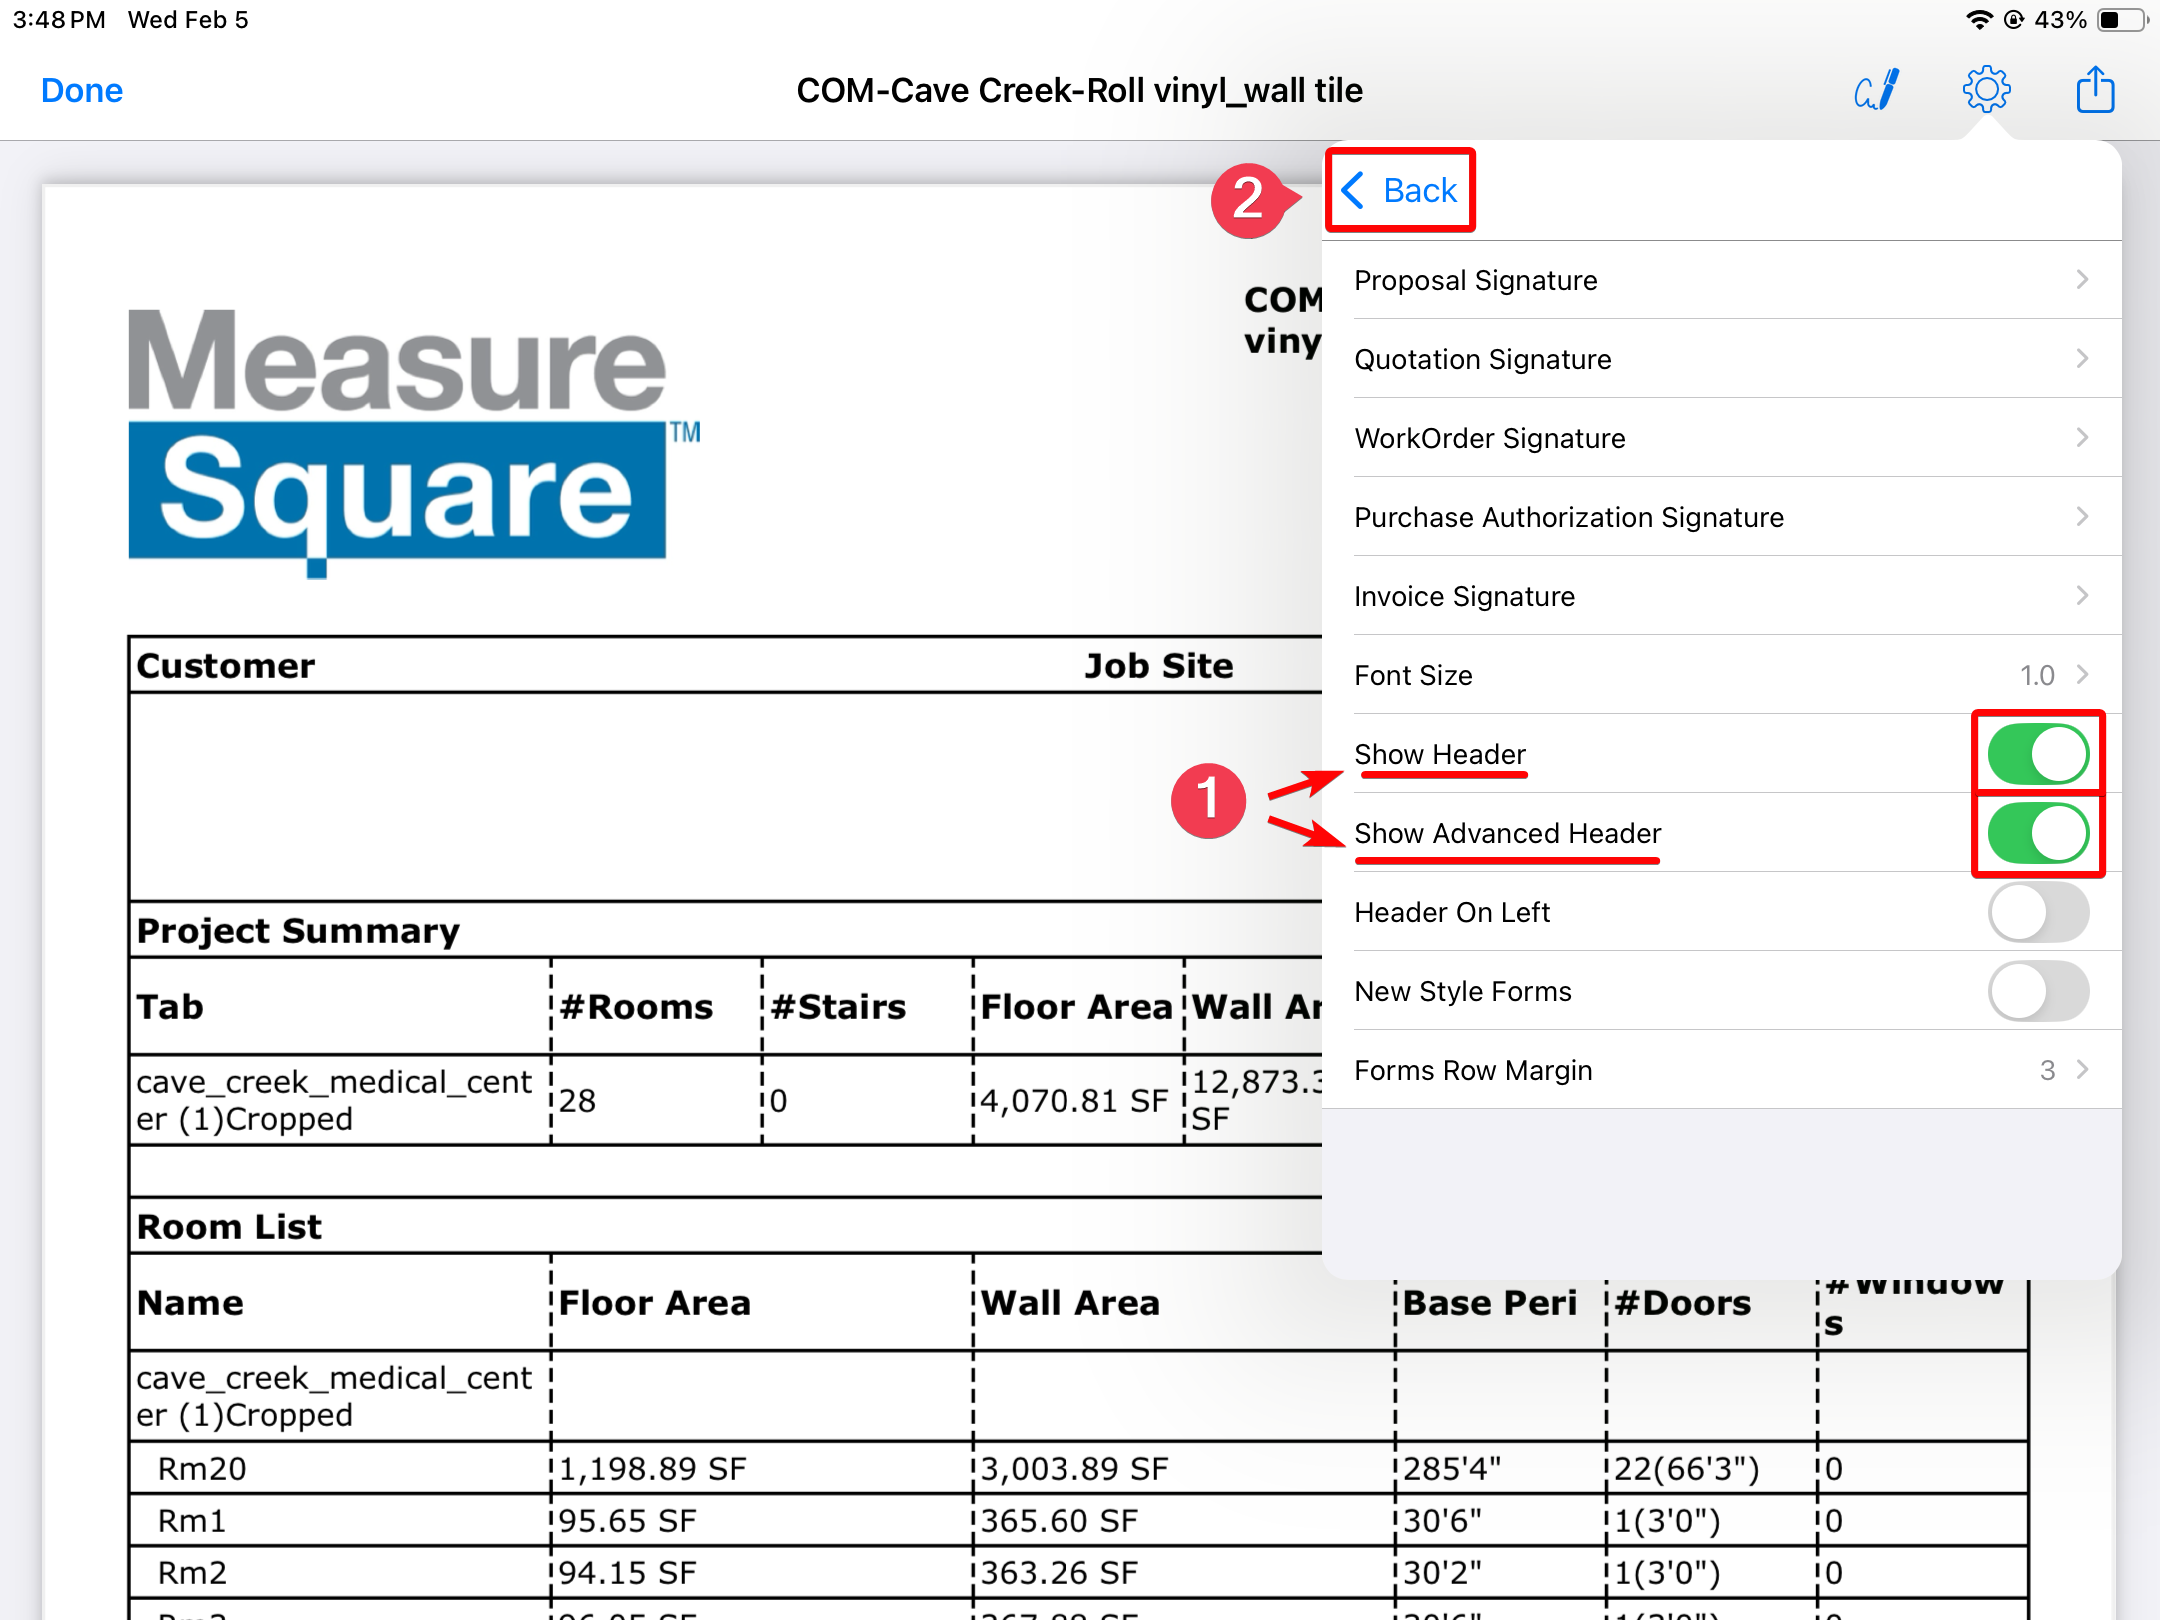
Step 3: Select Others
Step 4: Toggle on the options for Show Header and Show Advanced Header, then Return to the settings menu by tapping on back
Step 5: Select Print Settings
Step 6: Toggle on the Print Web Viewer Url and then adjust the displays for Quantity, Area/Perimeter, Dimensions, and Blue Print based on how much information you would like available from the link.

After Making these Changes, you will see your QR code Displayed
Related Articles
How to add QR code on my report and worksheet on Measure Square 8
In this article, you will learn how to add a QR code on your report and worksheet on MeasureSquare 8 which will allow other people to view a 3D model of the diagram on a browser Step 1: make sure you have synced your project to the MeasureSquare ...CRM User Manual: Procurement & Installation, Lesson 4: Mobile Solutions
What is MeasureSquare CRM Mobile? As part of your MeasureSquare CRM subscription, you automatically get access to the MeasureSquare CRM Mobile app — designed to keep you connected to your business anytime, anywhere. The app is currently in beta ...How to Generate a QR Code for 3D Viewer of My Diagram Floorplans on MeasureSquare 8?
This article will show you how to generate and share your 3D QR Code Viewer for Measure Square 8 and iPad. The 3D QR Code will allow your clients and installer access to view a 3D model of your diagram on a browser. Step One: Upload the Project to ...Learn how RollMaster integrates with Measure Square!
This integration works with all versions of MeasureSquare 8, iPad & Android Mobile. This video will show you how RollMaster & Measure Square talk to each other via the Cloud! See how to export job info to Measure Square, and how to import & update ...How to view the pictures took on the MeasureSquare Mobile (ipad) on MeasureSquare 8 (Desktop)
In this article, you will learn how to view the pictures that are took by MeasureSquare Mobile (ipad) on MeasureSquare 8 (Desktop) If you add Photos directly from the dashboard page of the project, it will not be able to show on MeasureSquare ...